Clean Design Blog - Documentation
- Getting Started
- Installation
- Demo Import
- Homepage Setup
- Frontpage Sections
- Header Settings
- Colors
- Innerpages Settings
- Footer Settings
- Posts Blocks
- Widgets
- Sidebars and Layouts Posts metaPro
- TypographyPro
Getting Started
Clean Design Blog is a creative, blog-focused, flexible, and clean-designed complete blog theme made for professionals. It is a customizer-based theme additionally extending features with 3 more widgets. Boasting popular features such as color options, typography, header layouts, abundant customizer settings, social icons, archive layouts, hover effects, and more to see. This beautiful theme provides repeatable sections like banner-slider, post-featured, posts-list, posts-grid, posts-carousel, posts-grid-alter, category-collection so you can make use of most of it. With 20+ sections layouts, you can design several page layouts.
Check out our beautiful pre-built demos now: https://blazethemes.com/theme/clean-design-blog-pro

Installation
- Get a copy of Clean Design Blog Theme ( buy Clean Design Blog Pro from the store)
- Unzip the downloaded zip file.
- Upload the unzipped file in to /wp-content/themes/
- Now, activate the theme by going to Appearance -> Themes in the wordpress dashboard.
- Activate the Clean Design Blog and Click on “Customize” in the Appearance Menu in the Dashboard. Now you can customize or modify according to your choice.
Demo Import
After you activate Clean Design Blog in your website. You can use demo import to make your site look like one of our available demos.
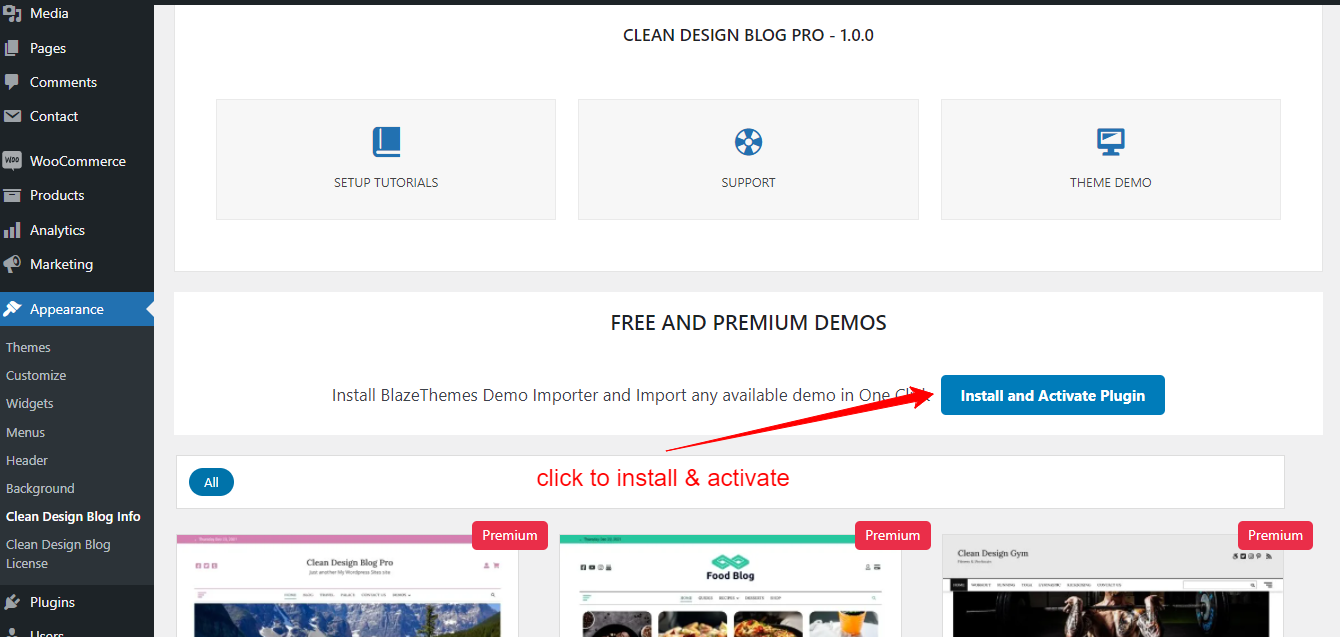
- Go to Appearance > Clean Design Blog Info
- You can see list of free and premium available demos in this page
- If you have not install/activate the Blazethemes Demo Importer plugin Click on install/activate demo importer button just above the demos listing section

- Then, hover onto the demo you want to import and Click Install
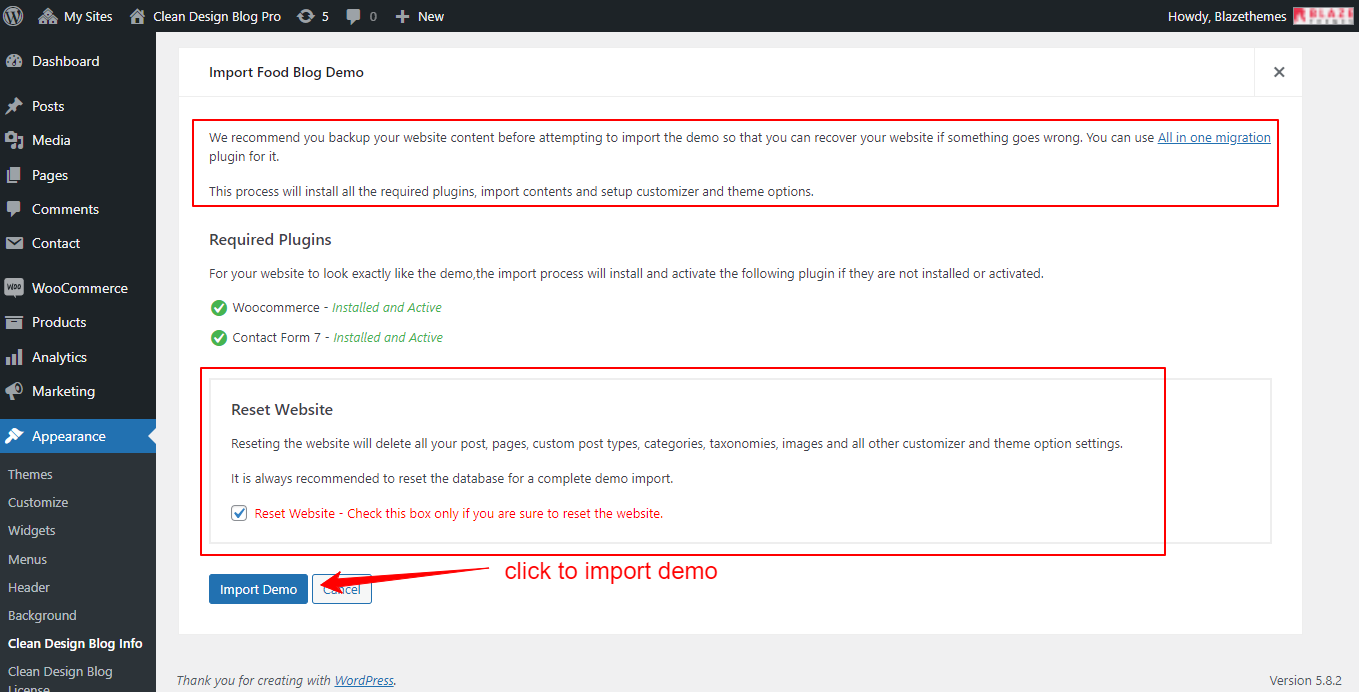
- It will land you to the demo importer setting page
- Check the box if you want to reset your website data before demo import( Note : It will erase all of your posts, pages, media and website data )
- Uncheck box if you donot want to erase your previous data. ( Note : Your site may not look exactly like demo as your previous posts, pages, categories or tags may collide with new datas )
- Final Note: Always backup your website before resetting website for demo import.
- Finally, your site now looks exactly like a demo. Go on and Customize further with your choice

Homepage Setup
- Go through Dashboard > Customizer > Homepage Settings > Enable the option “Show frontpage sections”

Frontpage Sections
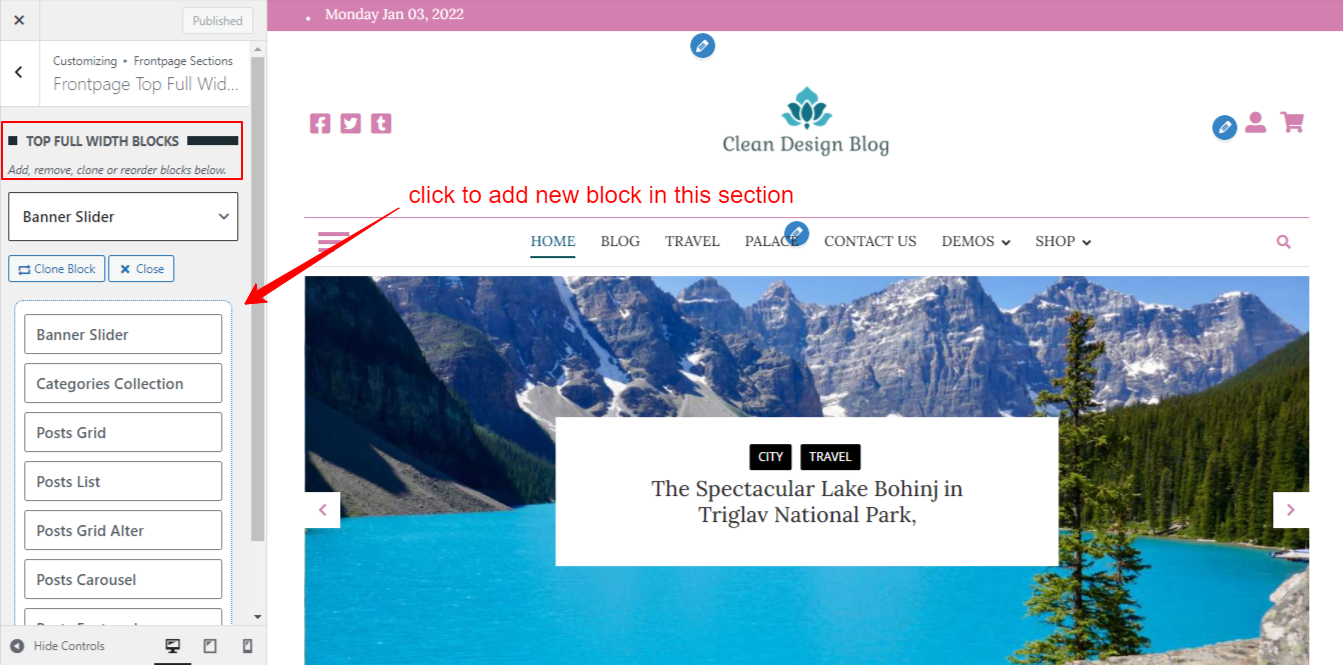
- Go To Dashboard > Appearance> Customize > Frontpage Sections > Frontpage top Full Width Section

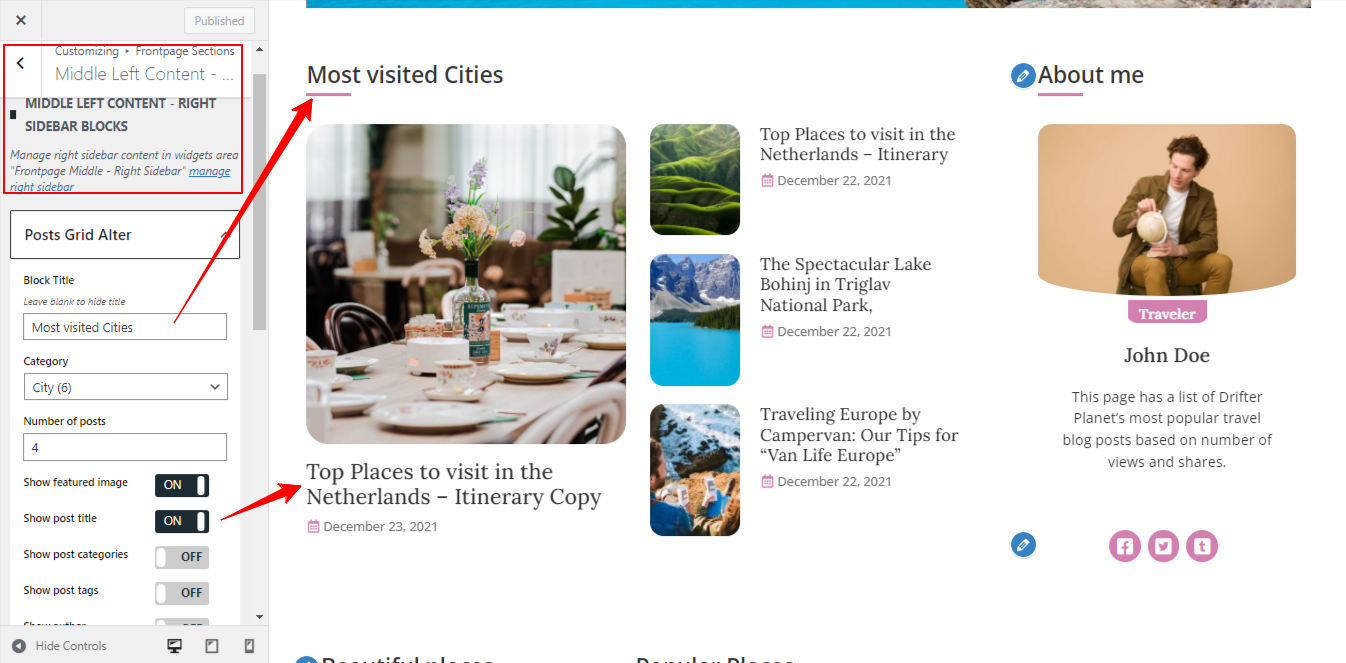
- Go To Dashboard > Appearance> Customize > Frontpage Sections > Middle Left Content – Right Sidebar Section
- For Right Sidebar, Go To Dashboard > Appearance > Widgets > Add widgets to the Frontpage Middle – Right Sidebar

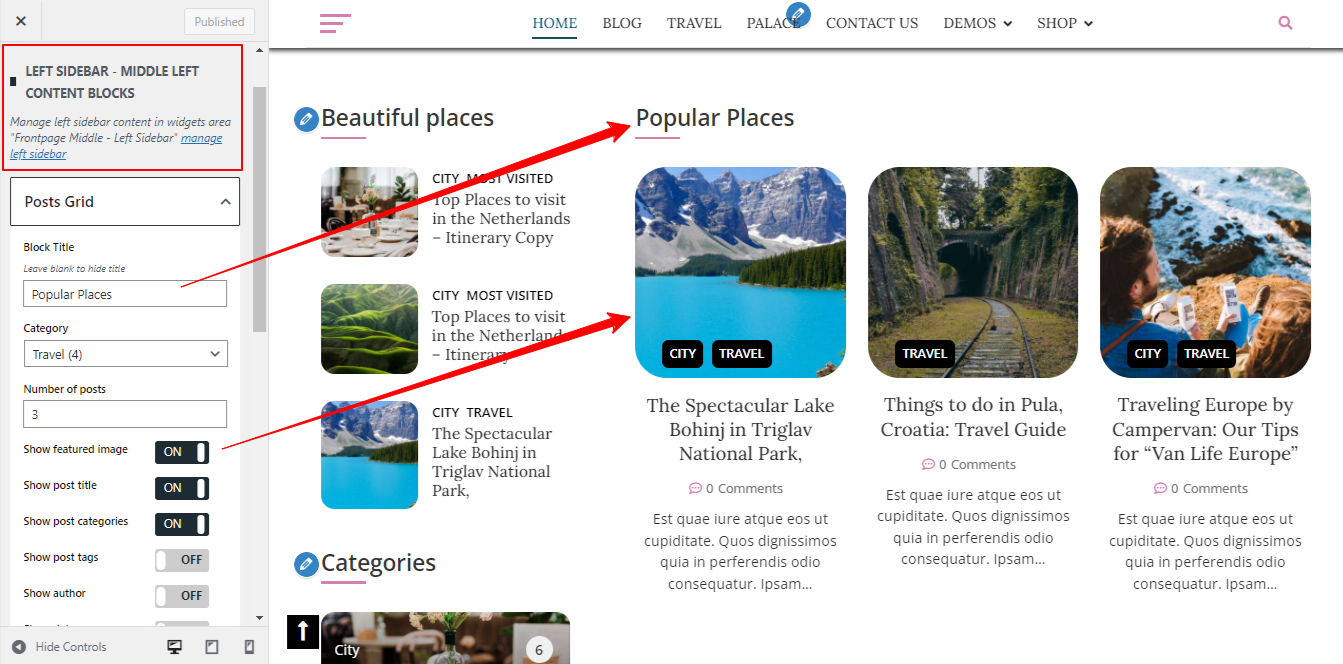
- Go To Dashboard > Appearance> Customize > Frontpage Sections > Left Sidebar – Middle Right Content Section
- For Left Sidebar, Go To Dashboard > Appearance > Widgets > Add widgets to the Frontpage Middle – Left Sidebar

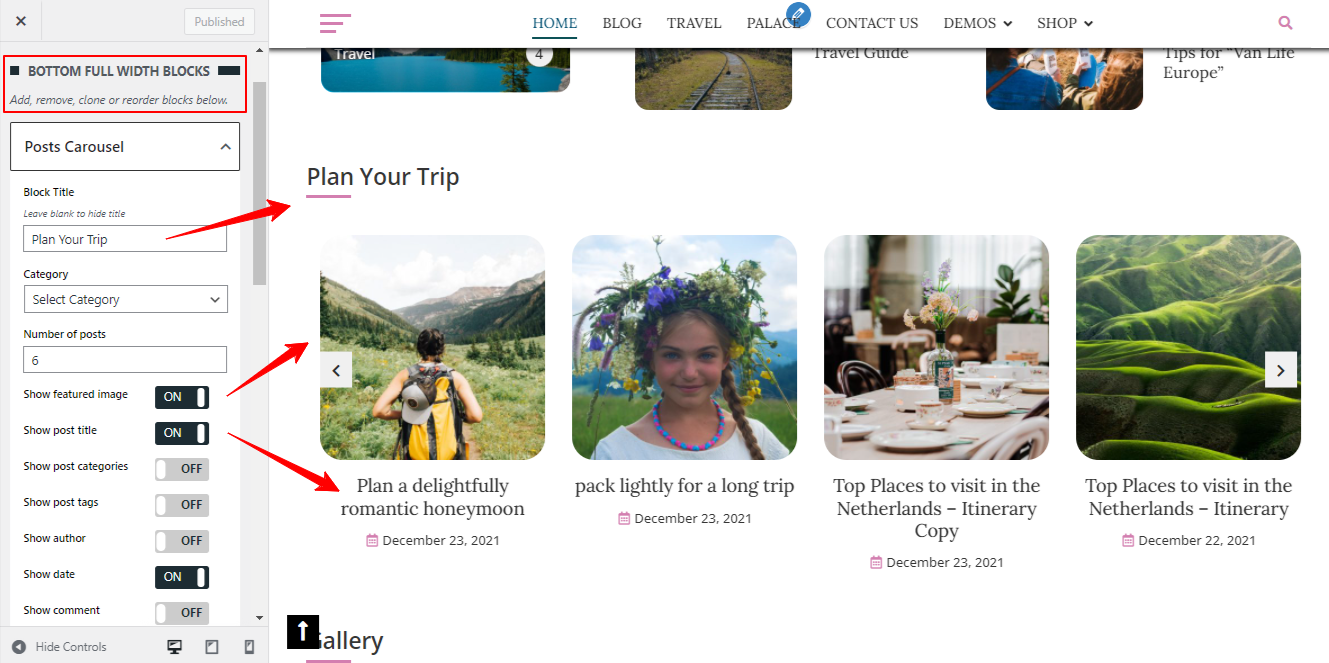
- Go To Dashboard > Appearance> Customize > Frontpage Sections > Bottom Full Width Section

Header Settings
- Go To Dashboard > Customizer > Header Settings > Top Header
General Settings
- change contents for top header

Style Settings
- change background color and font color

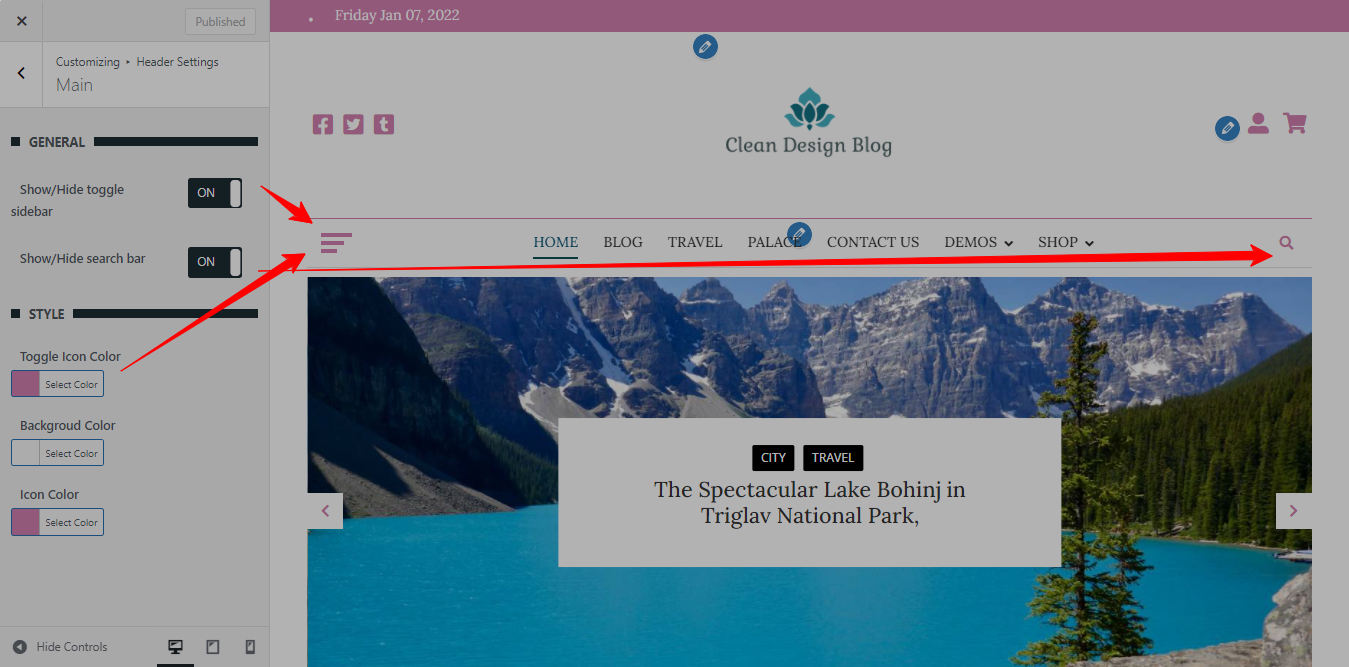
- Go To Dashboard > Customizer > Header Settings > Main
General Settings
- change contents for header
Style Settings
- change background color and font color

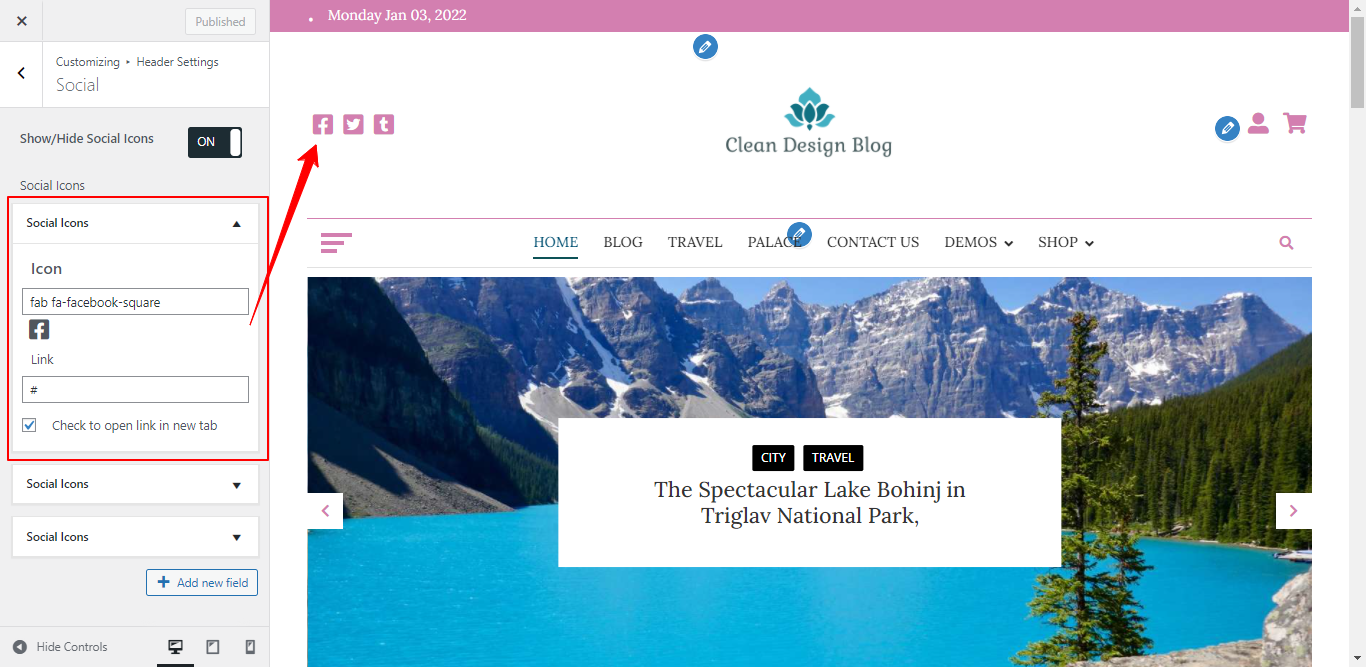
- Go To Dashboard > Customizer > Header Settings > Social
- Manage social icons for the site

Colors
- Go To Dashboard > Appearance > Customize > Colors

- Go To Dashboard > Appearance > Customize > Categories Colors

Innerpages Settings
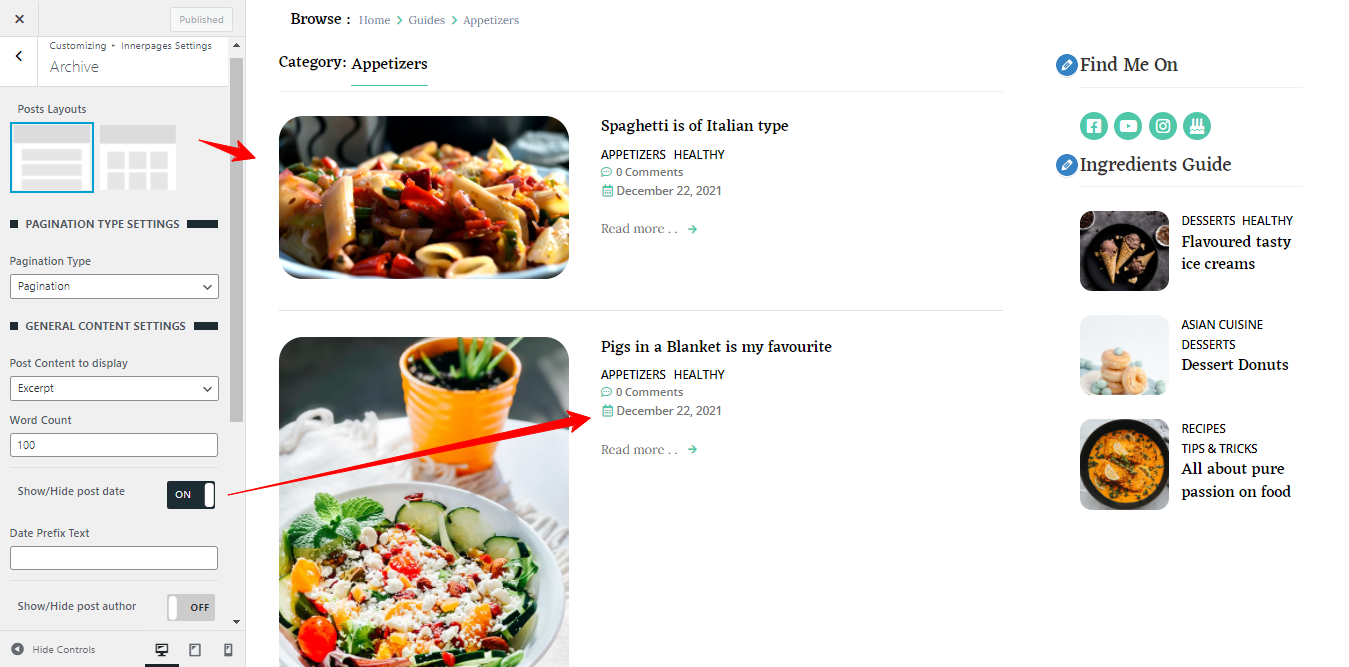
- Go To Dashboard > Customizer > Innerpages Settings > Archive

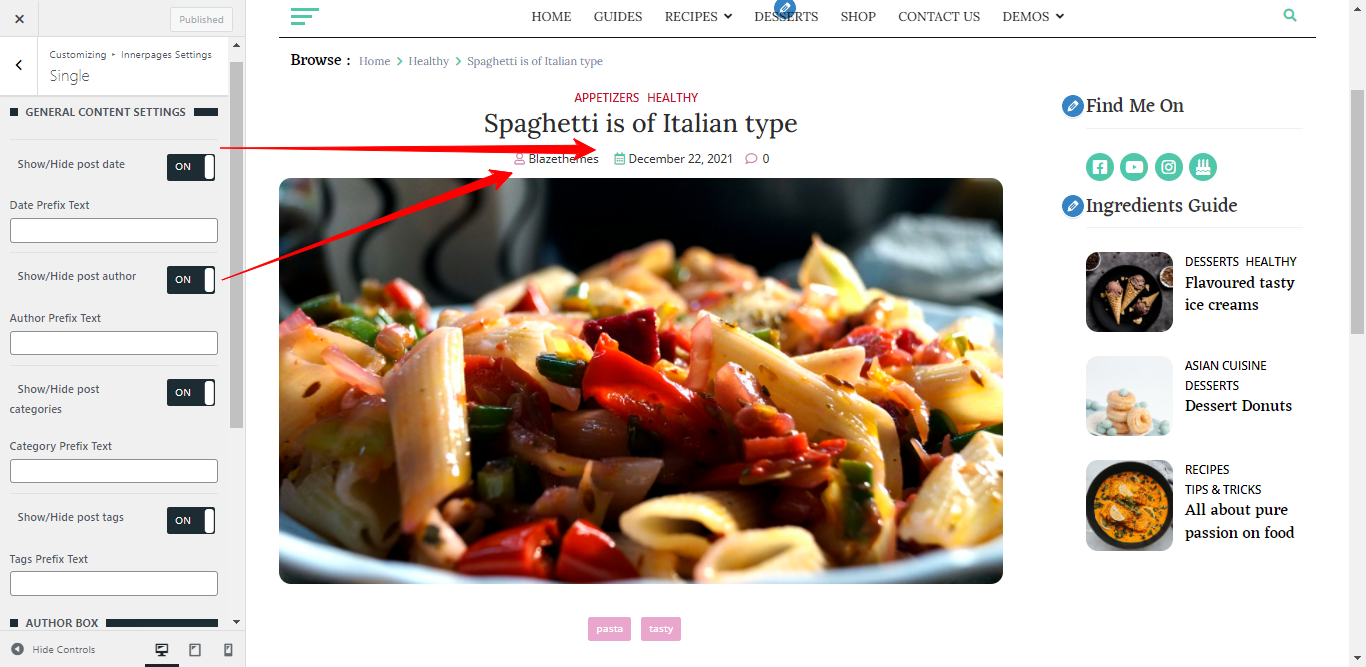
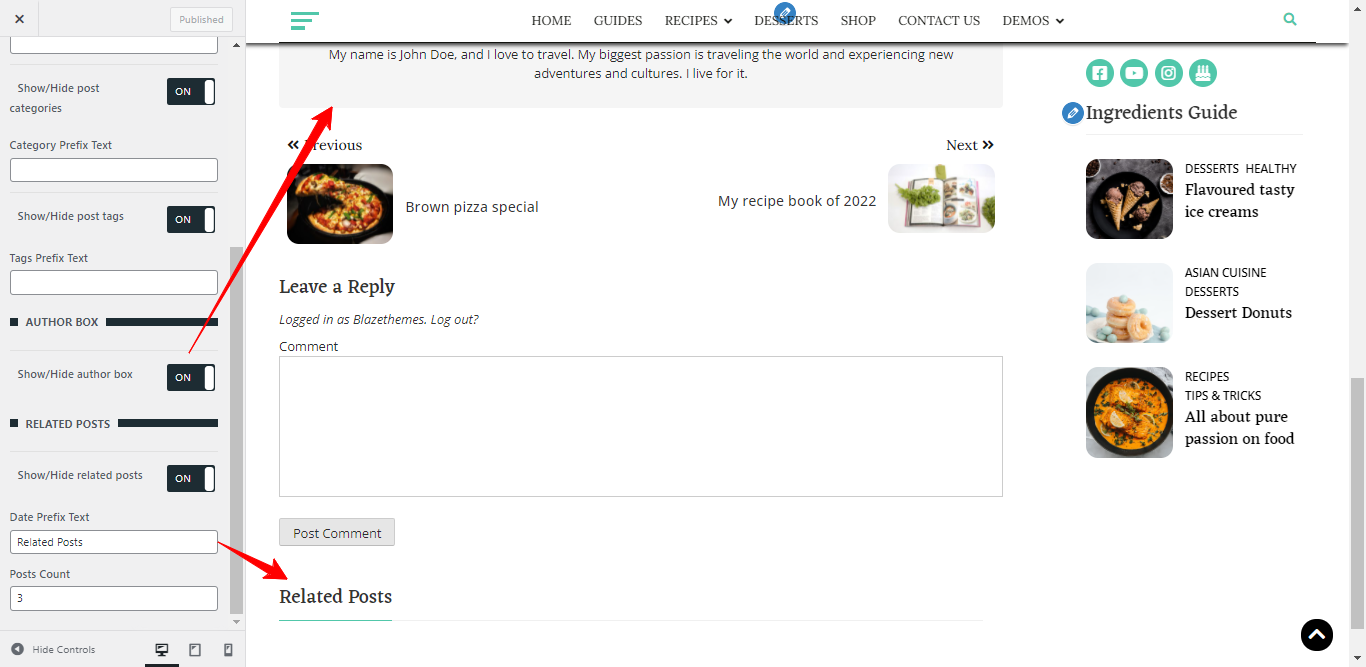
- Go To Dashboard > Customizer > Innerpages Settings > Single


- Go To Dashboard > Customizer > Innerpages Settings > Search
- Go To Dashboard > Customizer > Innerpages Settings > 404

Footer Settings
- Go To Dashboard > Customizer > Footer Settings > Main
General Settings
- change contents for header
Style Settings
- change background color and font color

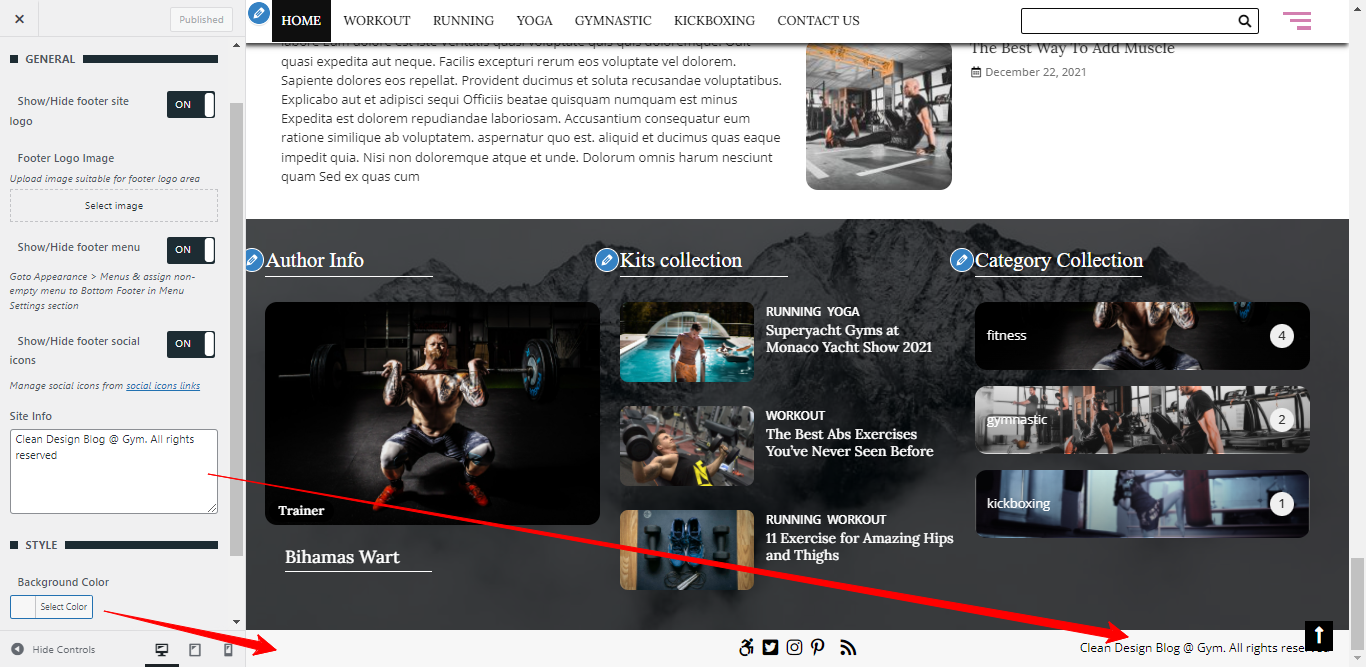
- Go To Dashboard > Customizer > Footer Settings > Bottom Footer
General Settings
- change contents for header
Style Settings
- change background color and font color

Posts Blocks
- Go To Dashboard > Appearance> Customize > Frontpage Sections
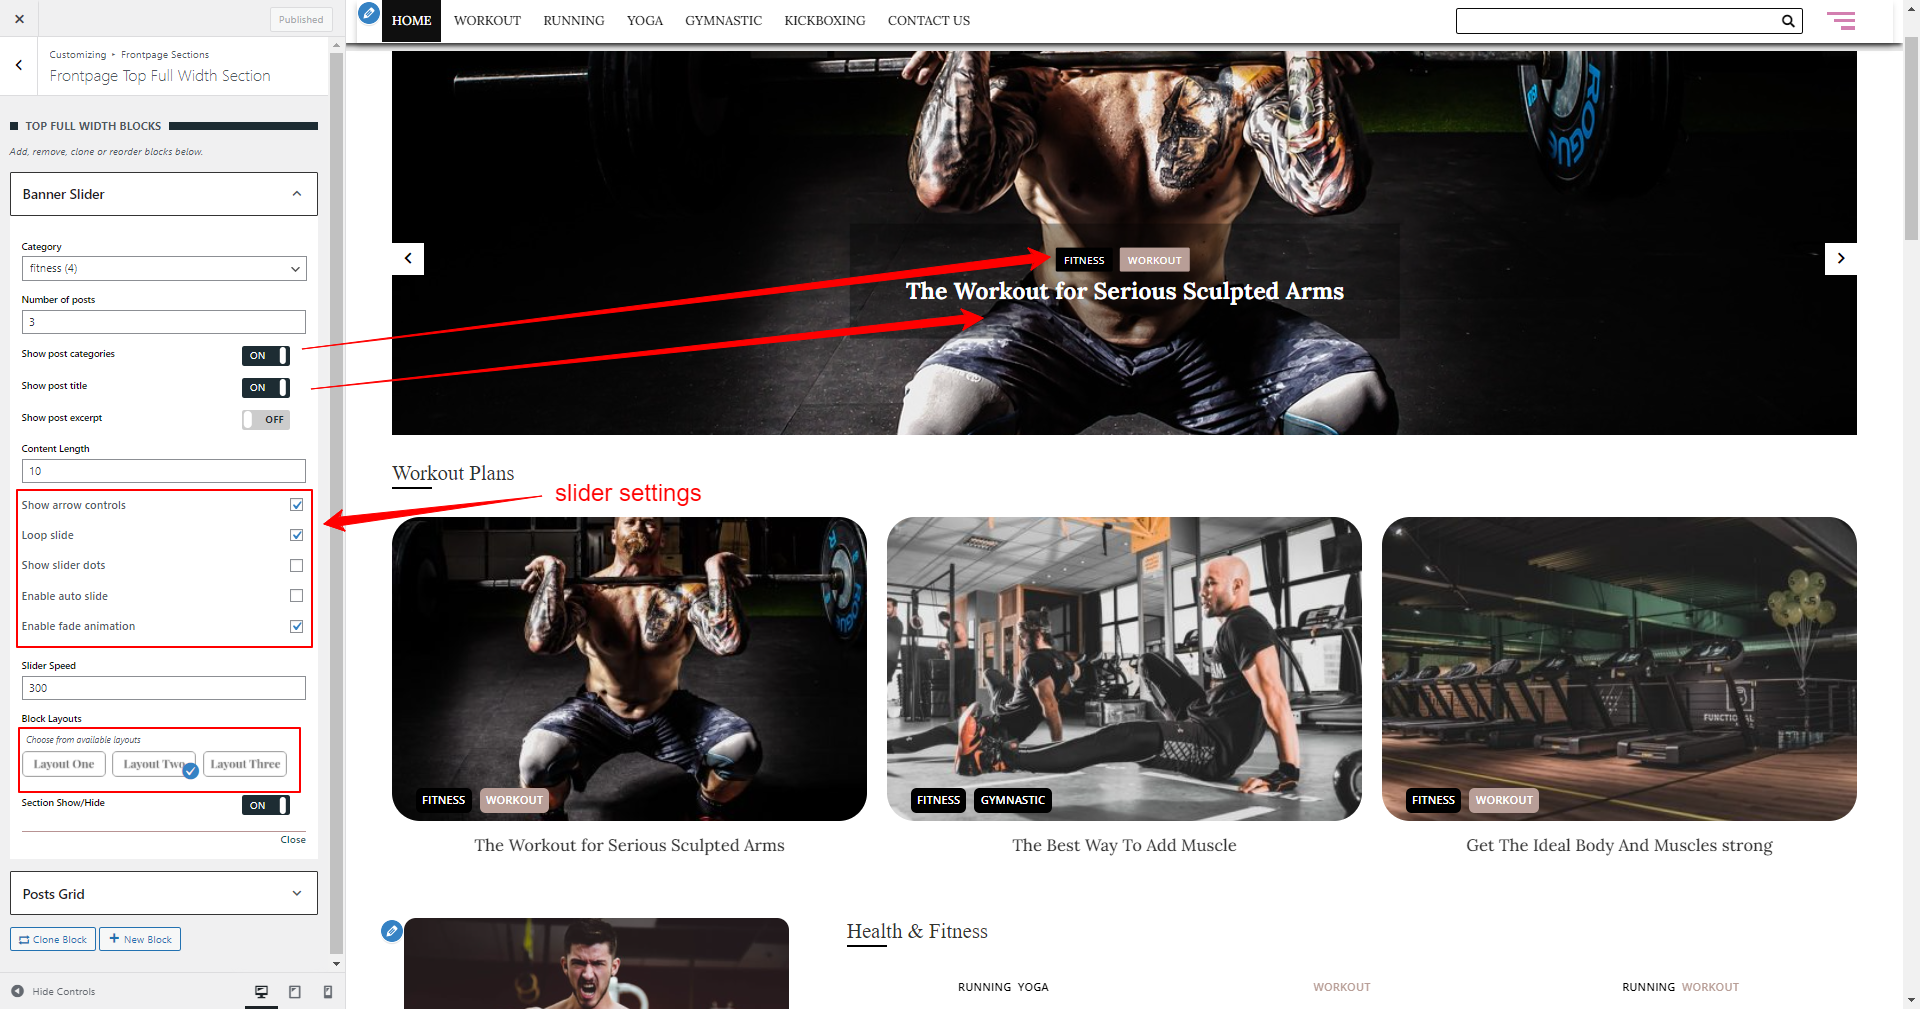
- You can “Banner Slider” block in any section

- Go To Dashboard > Appearance> Customize > Frontpage Sections
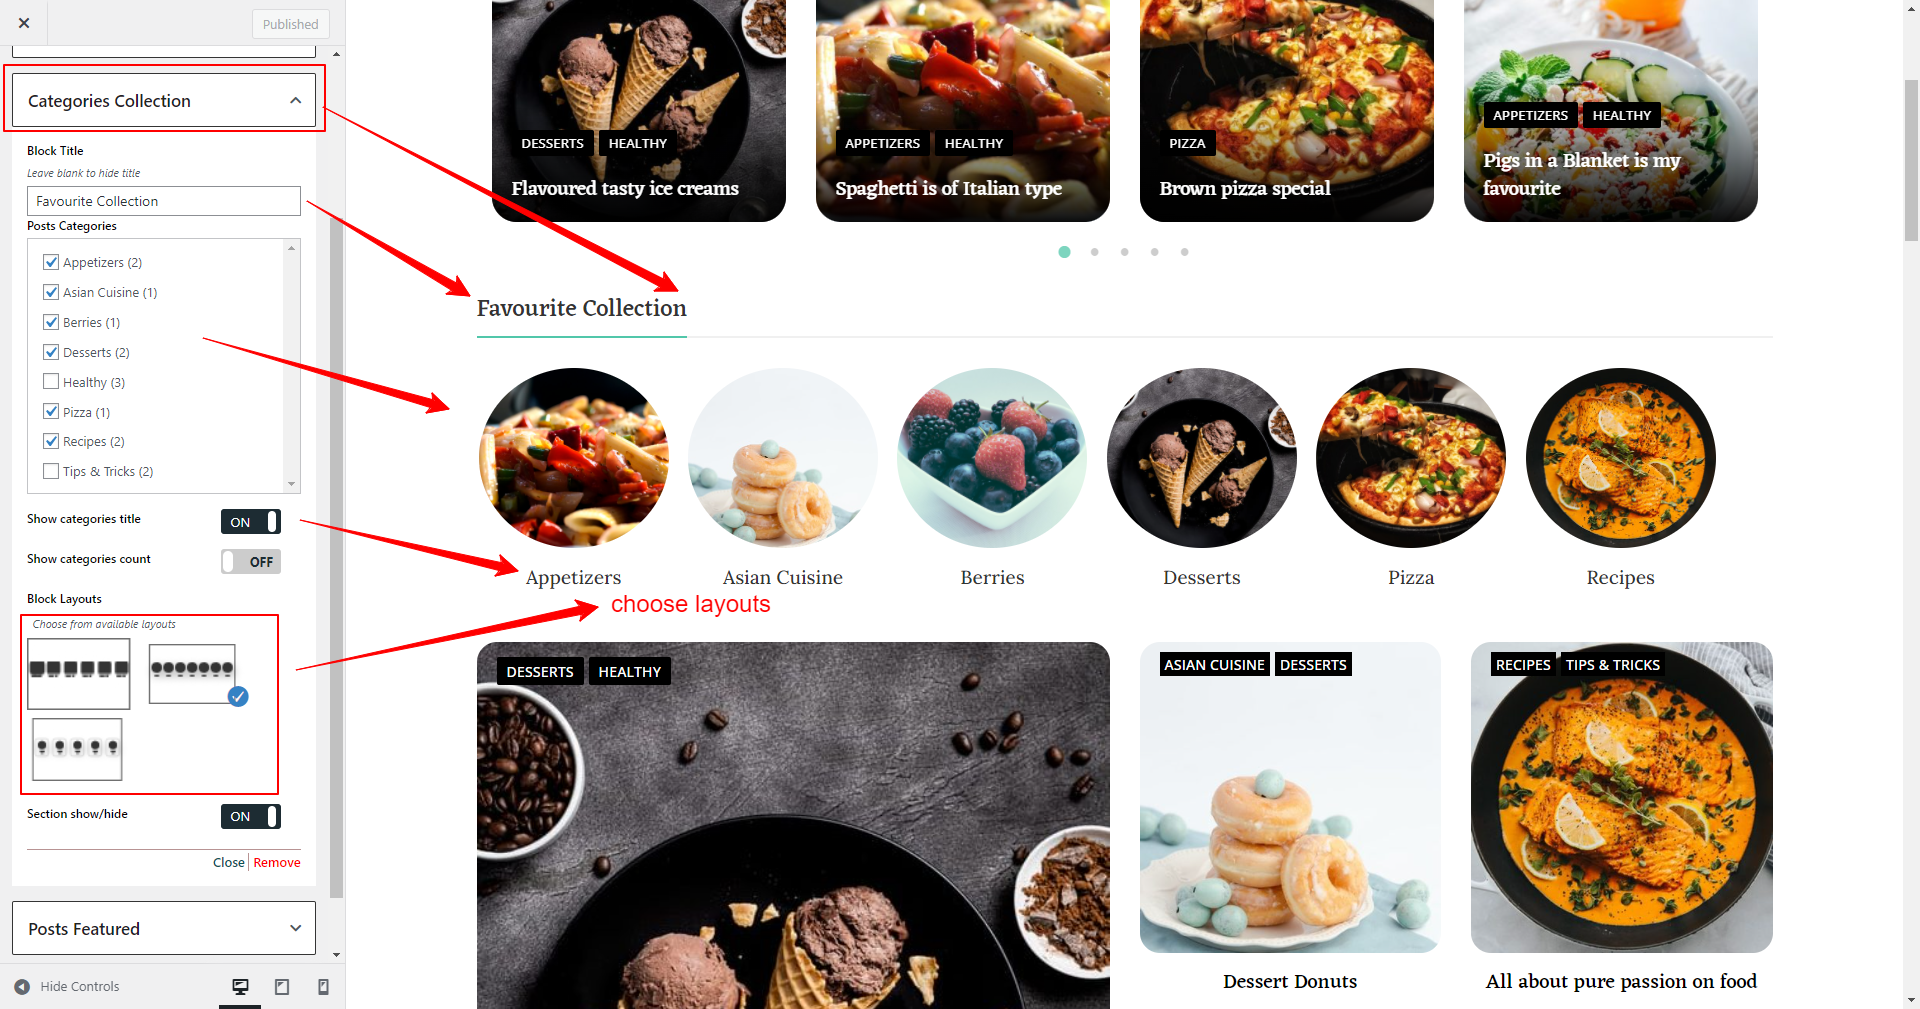
- You can “Categories Collection” block in any section

- Go To Dashboard > Appearance> Customize > Frontpage Sections
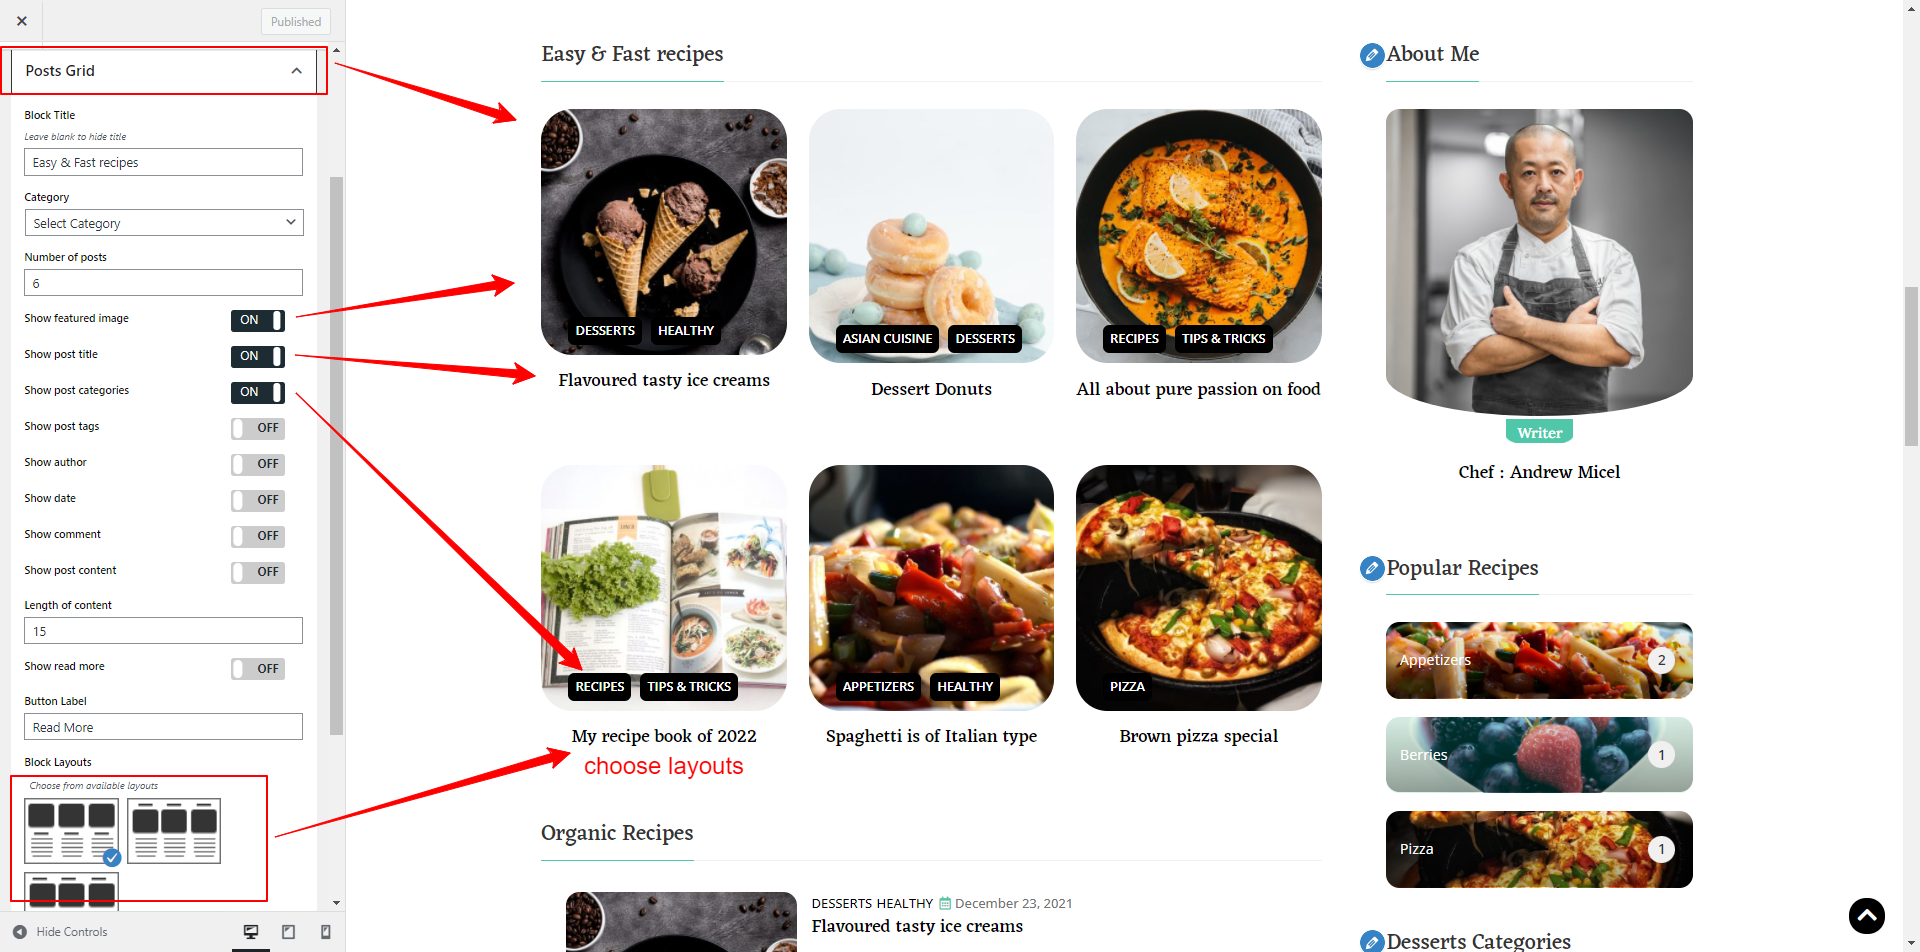
- You can “Posts Grid” block in any section

- Go To Dashboard > Appearance> Customize > Frontpage Sections
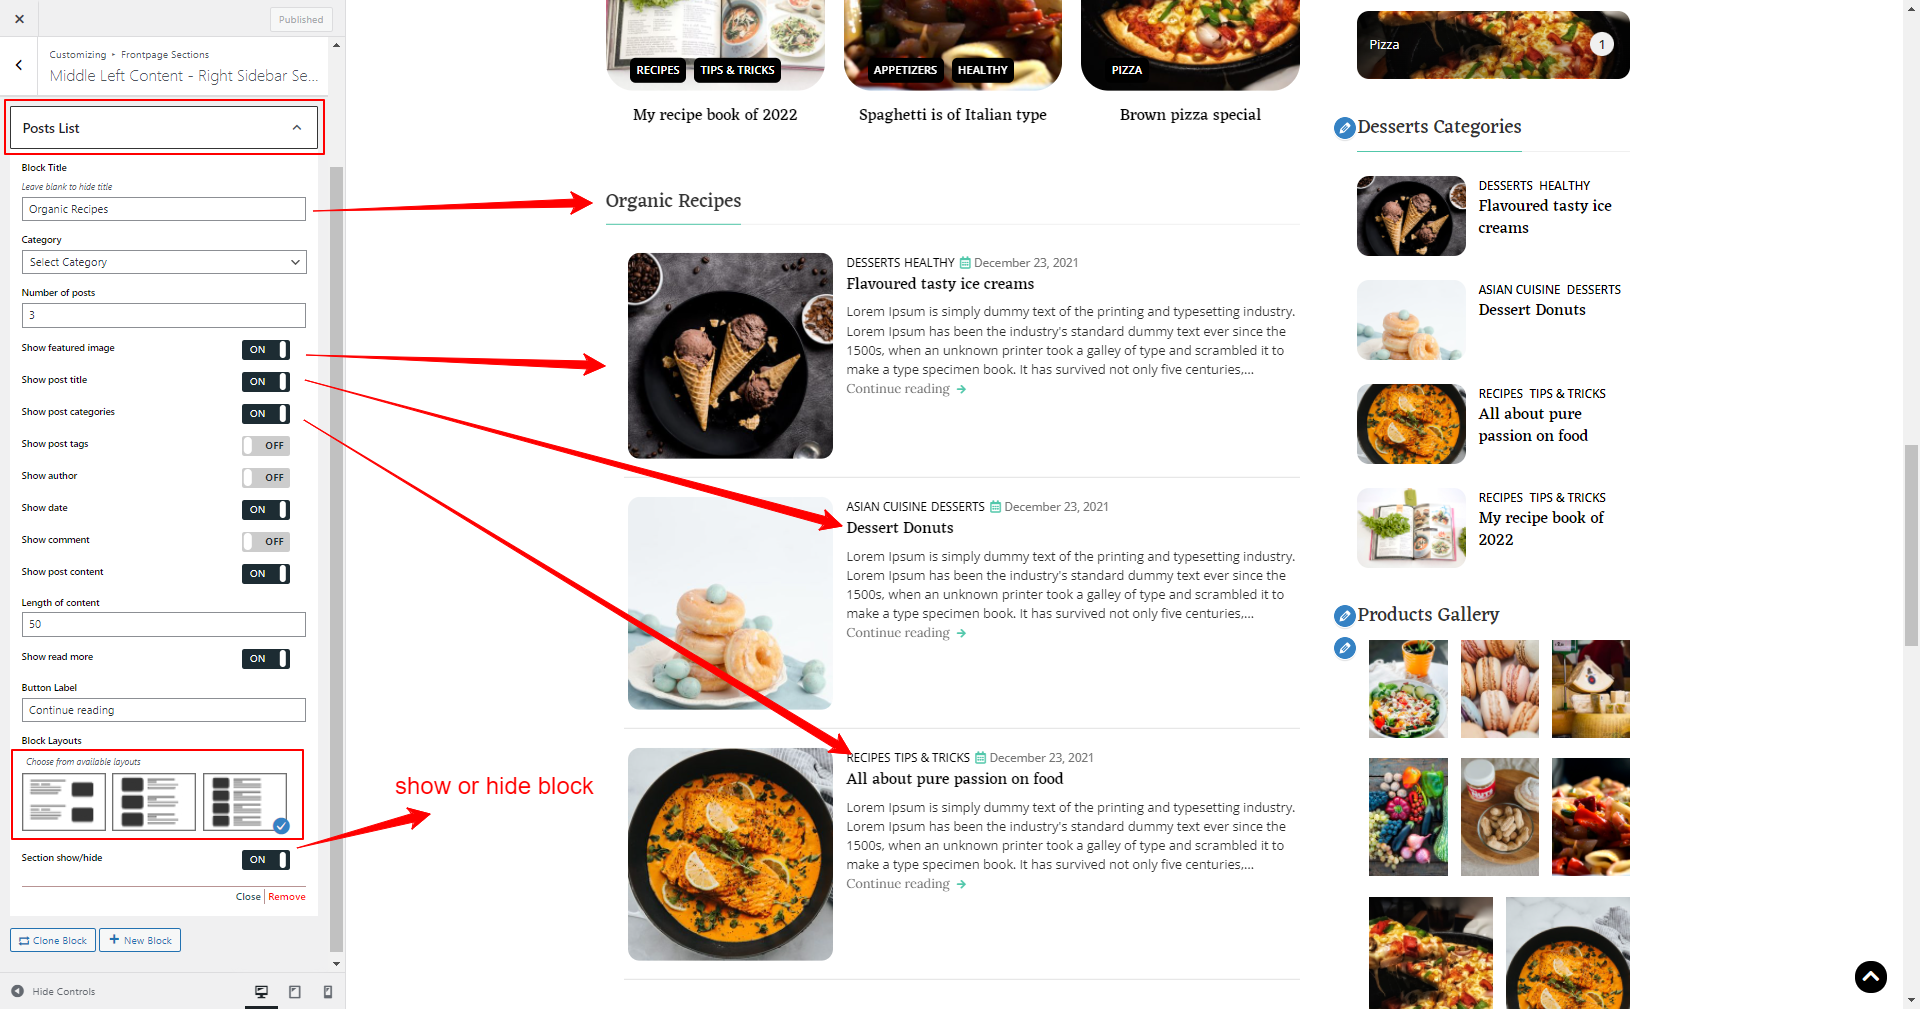
- You can “Posts List” block in any section

- Go To Dashboard > Appearance> Customize > Frontpage Sections
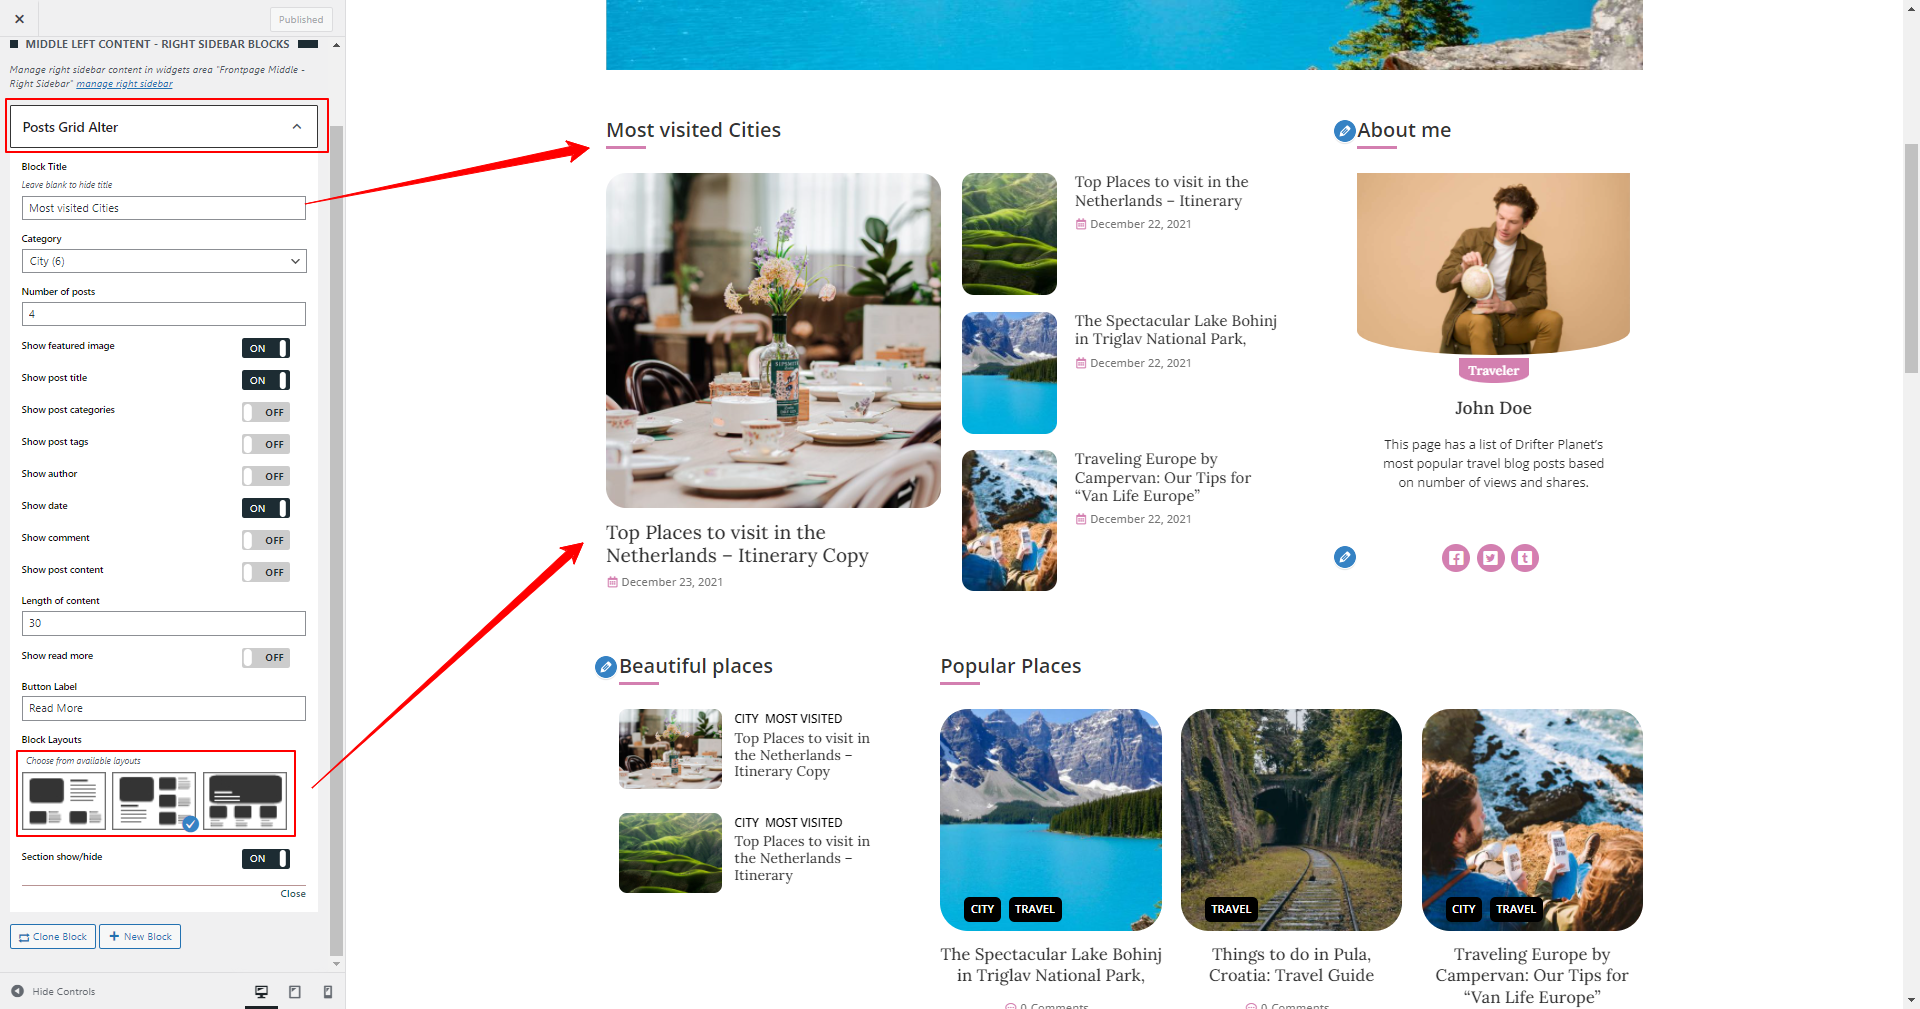
- You can “Posts Grid Alter” block in any section

- Go To Dashboard > Appearance> Customize > Frontpage Sections
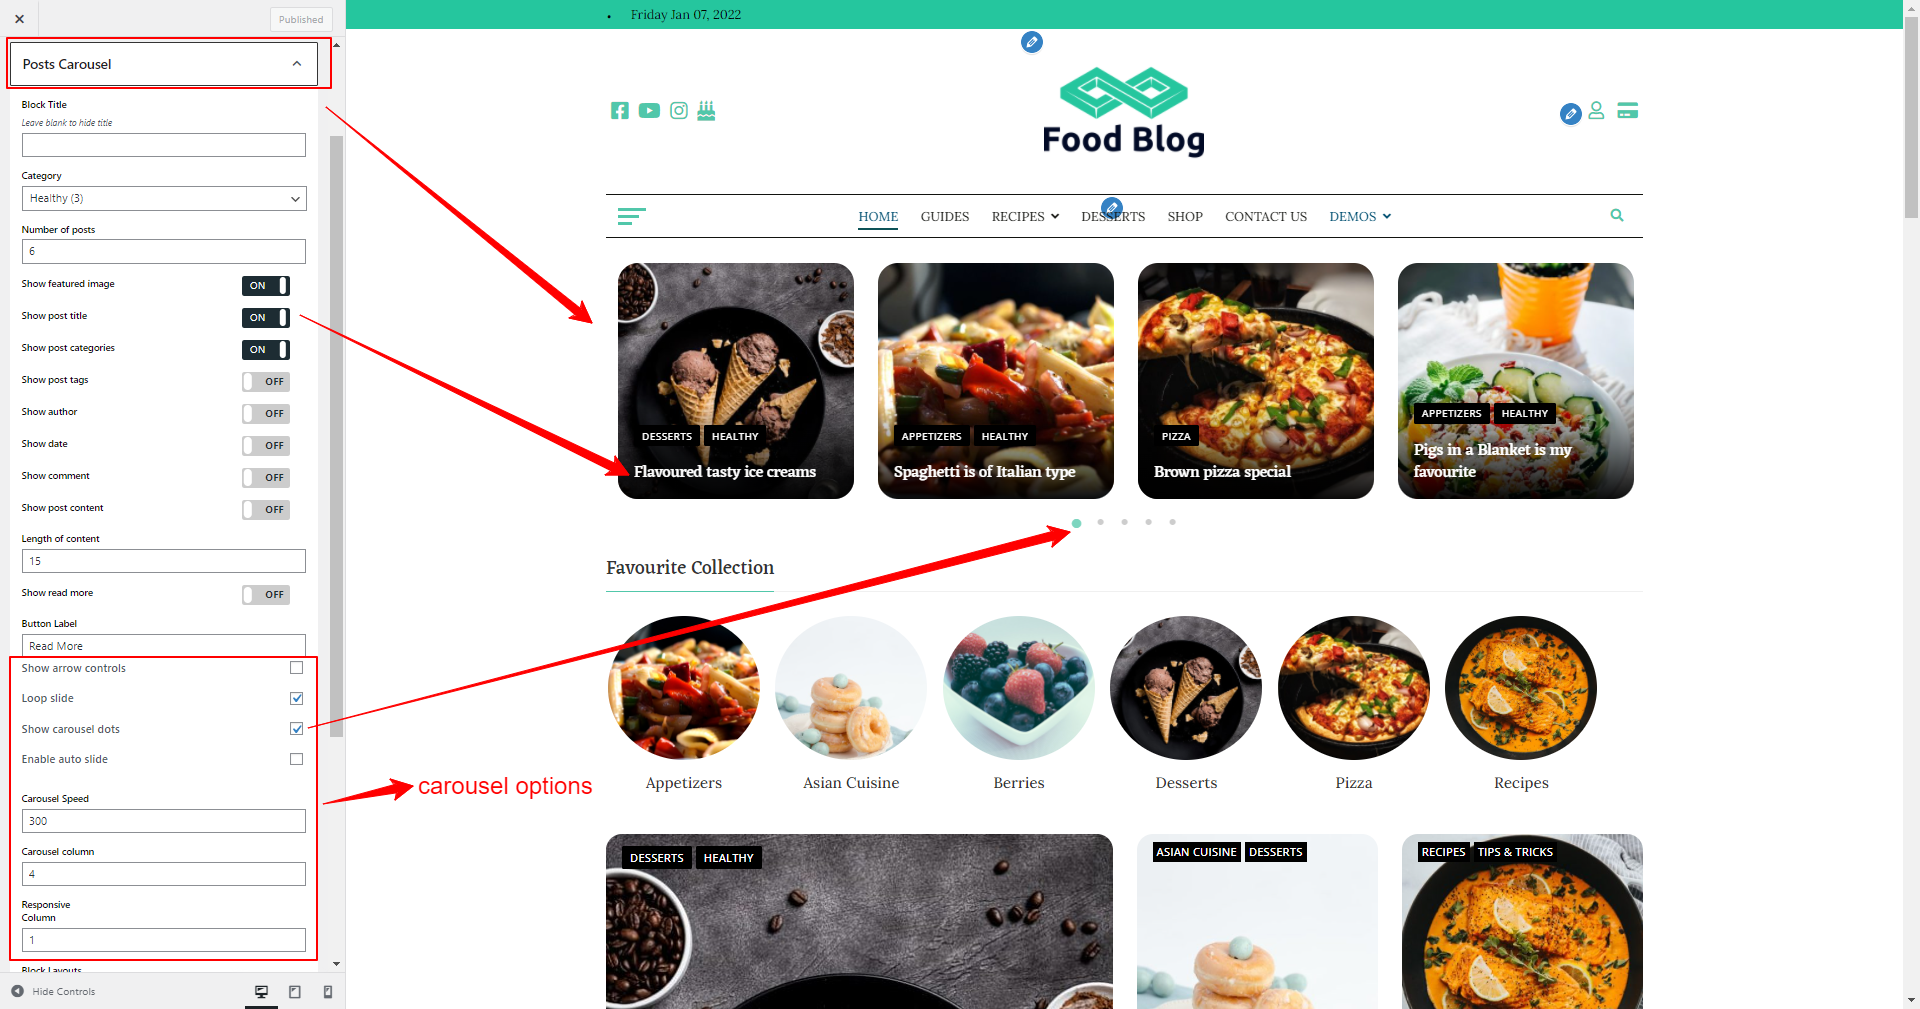
- You can “Posts Carousel” block in any section

- Go To Dashboard > Appearance> Customize > Frontpage Sections
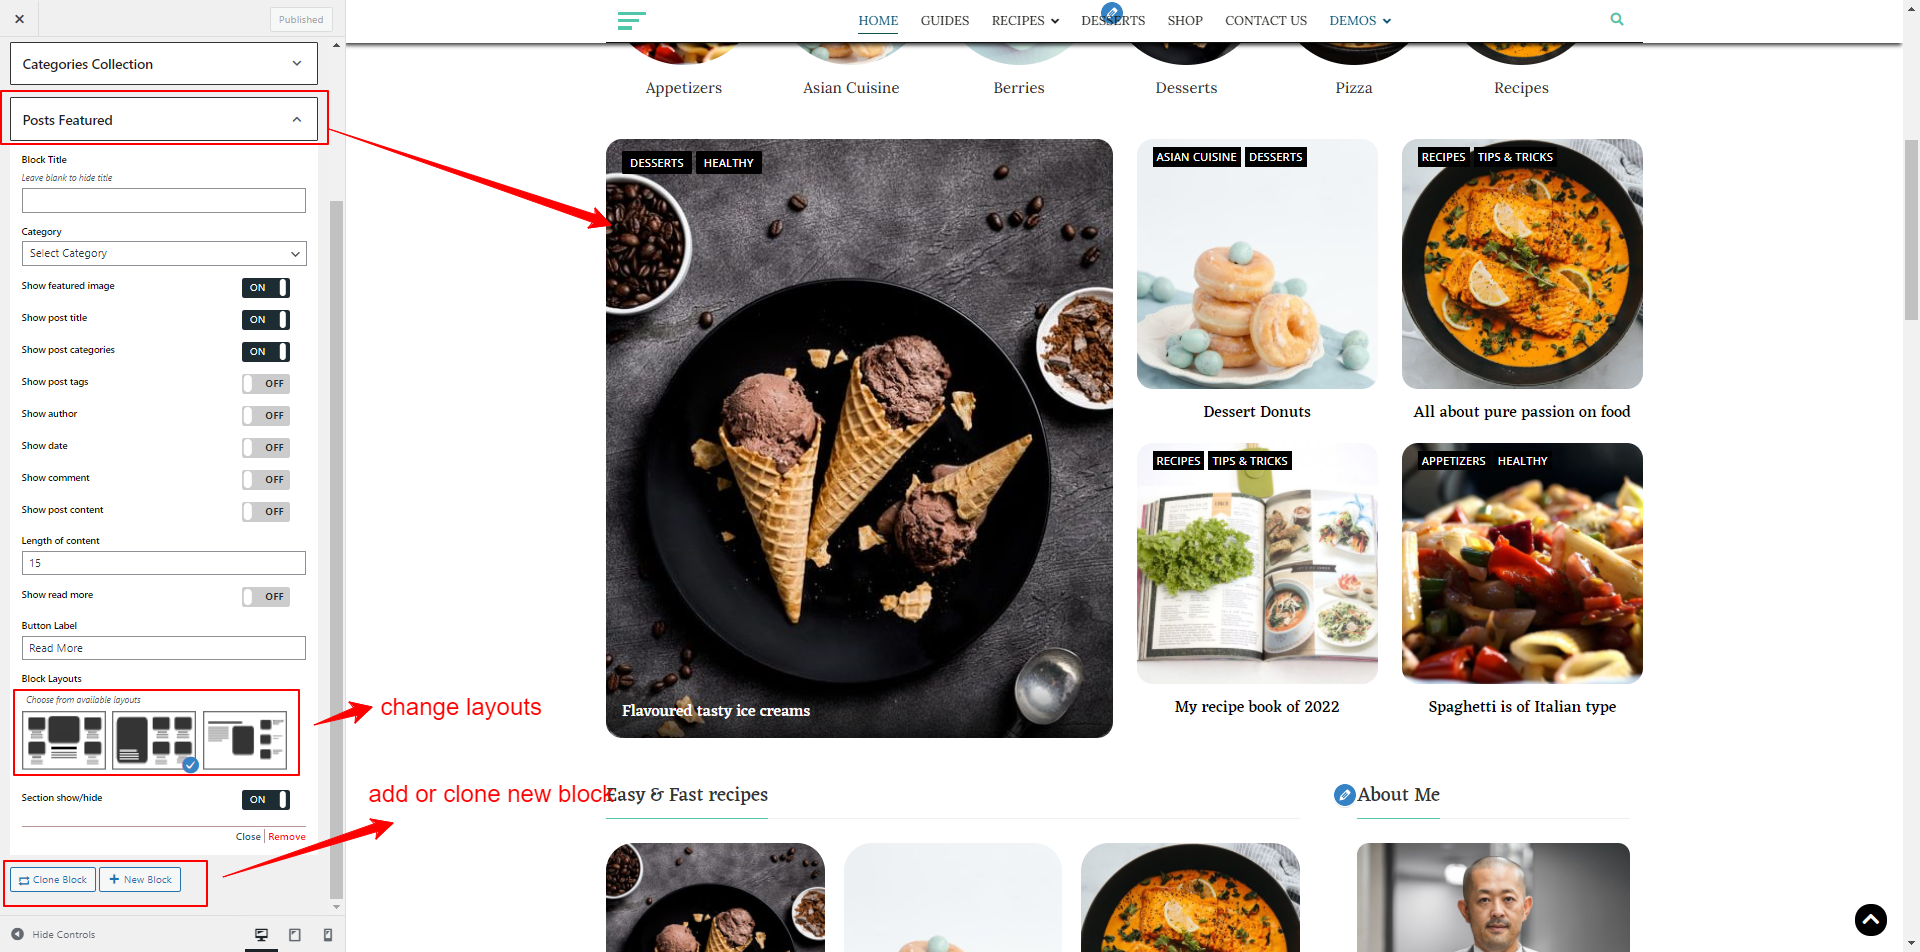
- You can “Posts Featured” block in any section

Widgets
- Go To Dashboard > Appearance > Widgets
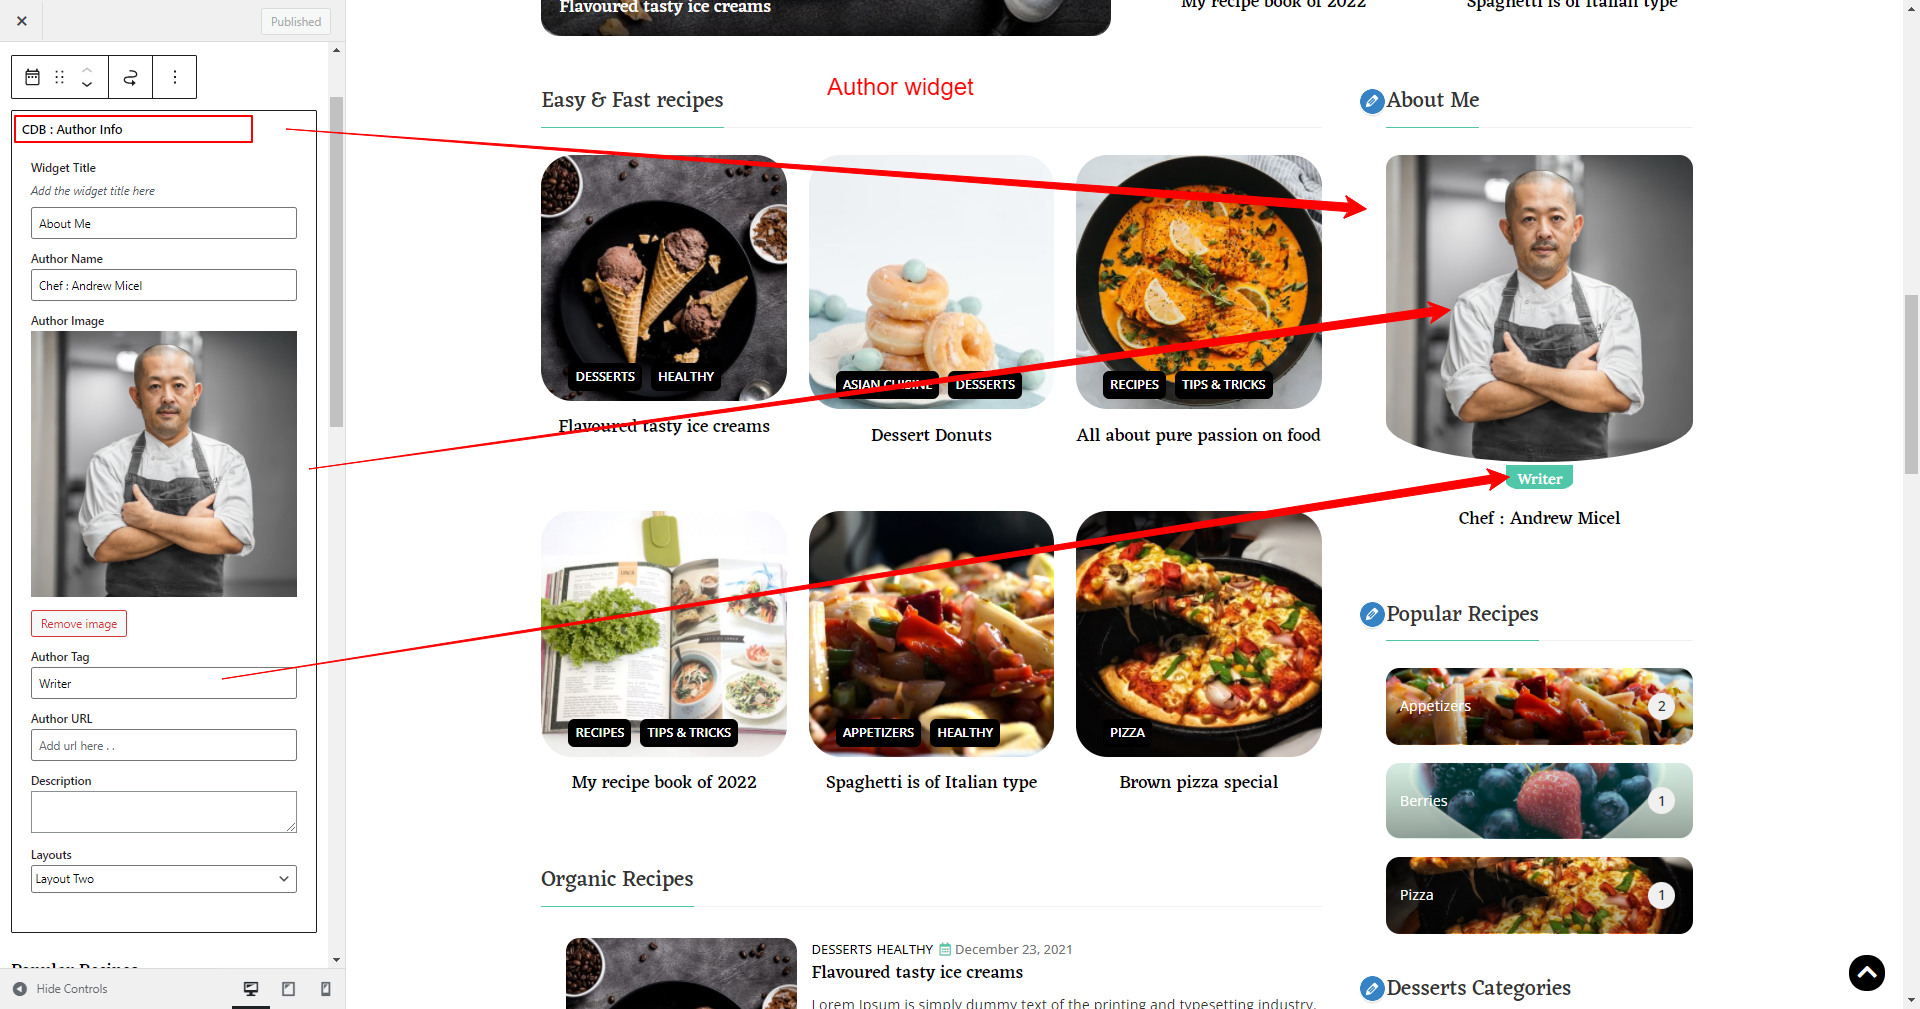
- Drag and drop “CDB : Author Info” widget in the sidebar you want

- Go To Dashboard > Appearance > Widgets
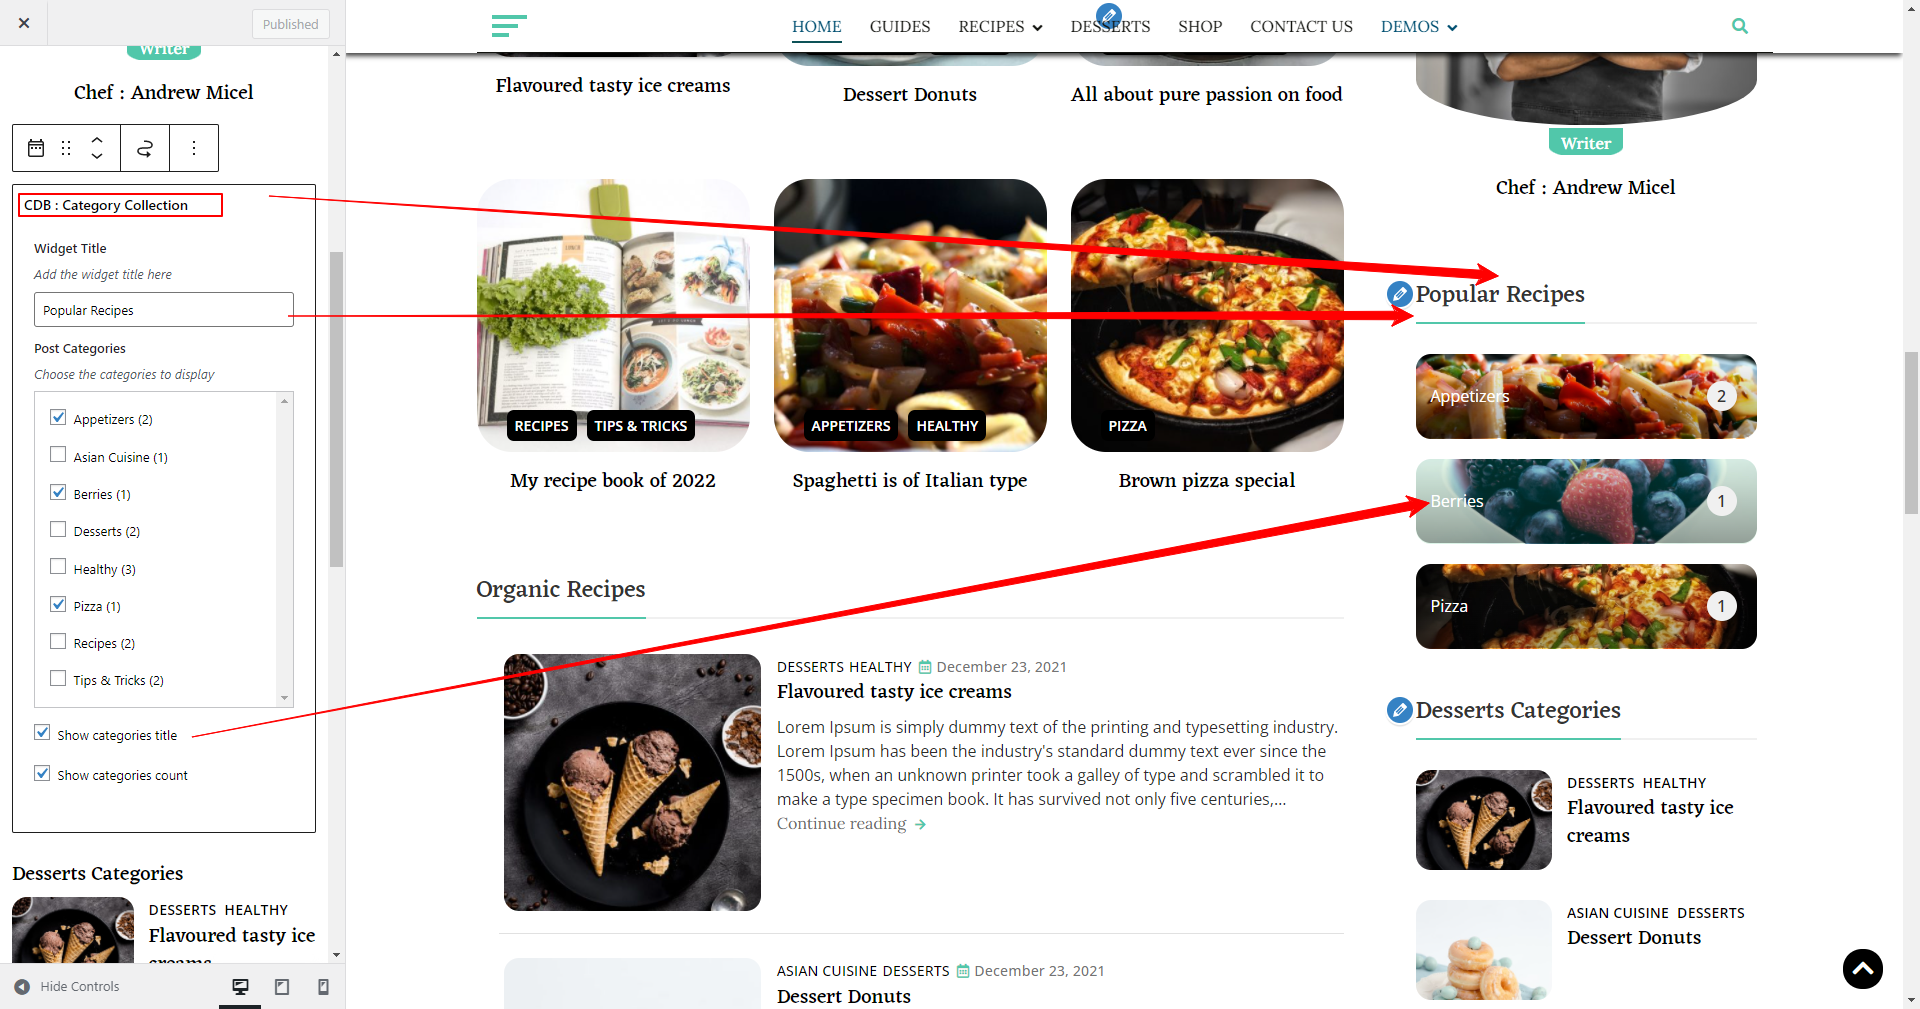
- Drag and drop “CDB : Category Collection” widget in the sidebar you want

- Go To Dashboard > Appearance > Widgets
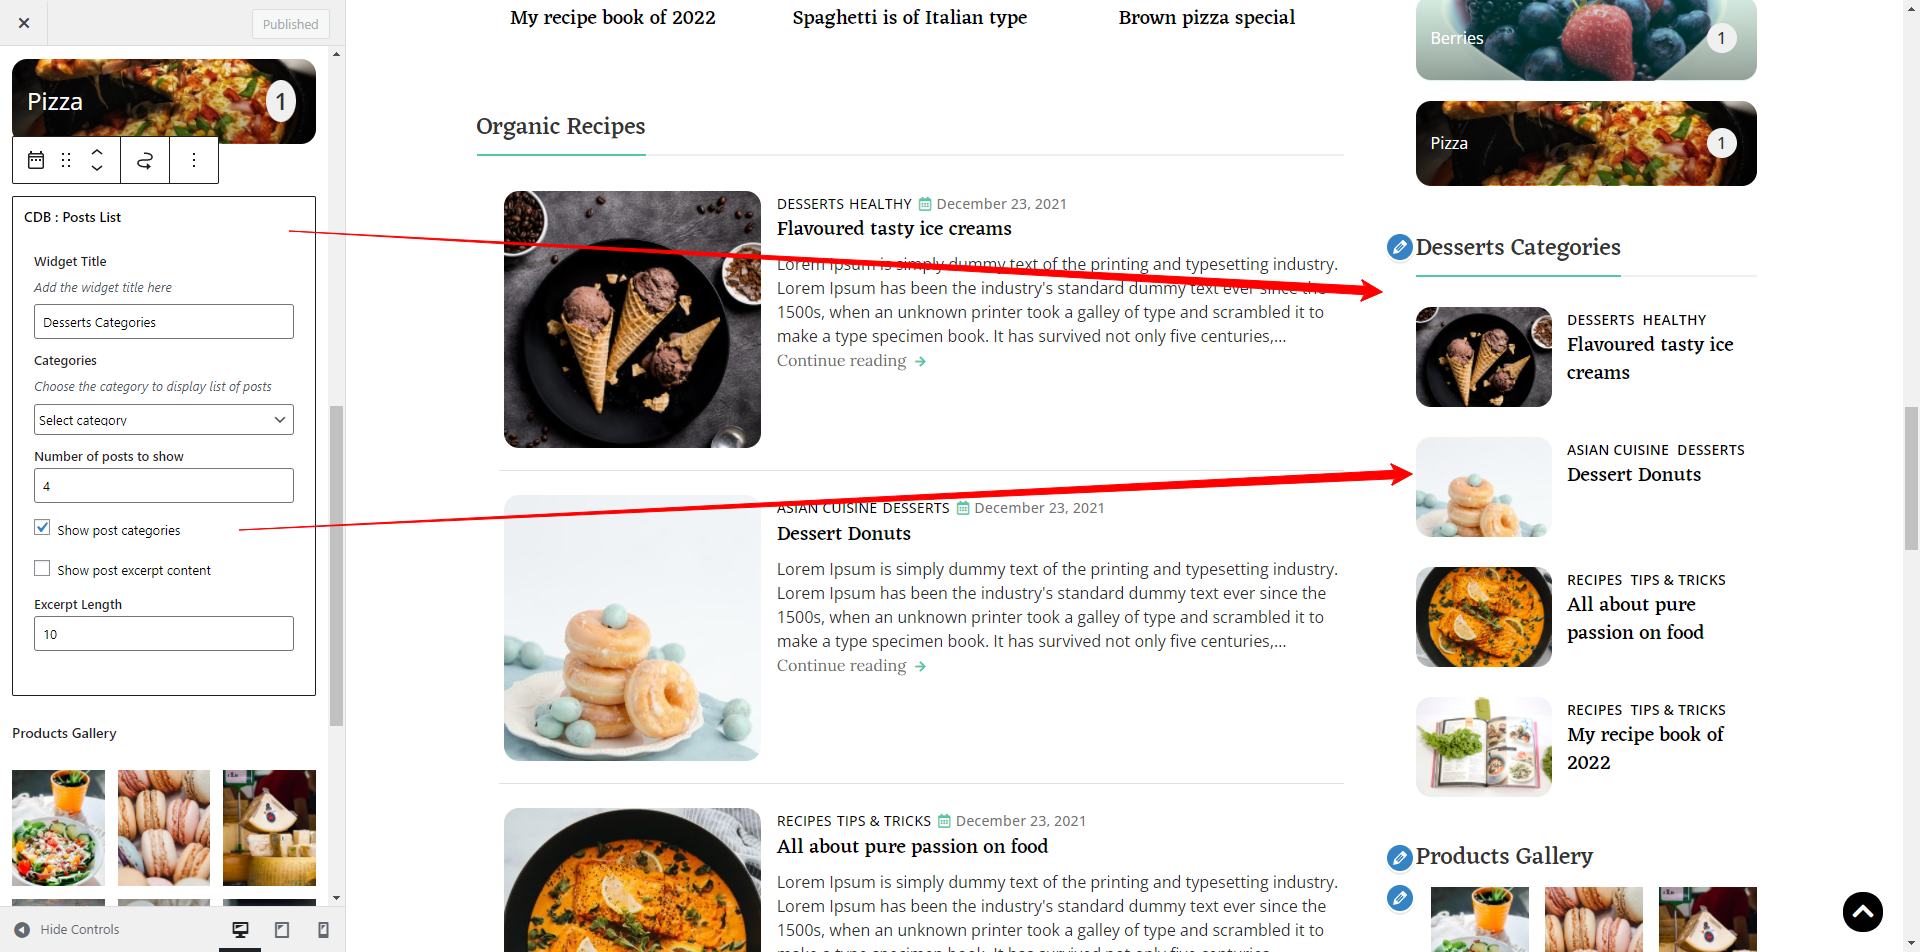
- Drag and drop “CDB : Posts List” widget in the sidebar you want

- Go To Dashboard > Appearance > Widgets
- Drag and drop “CDB : Social Icons” widget in the sidebar you want
Sidebars and Layouts Posts meta
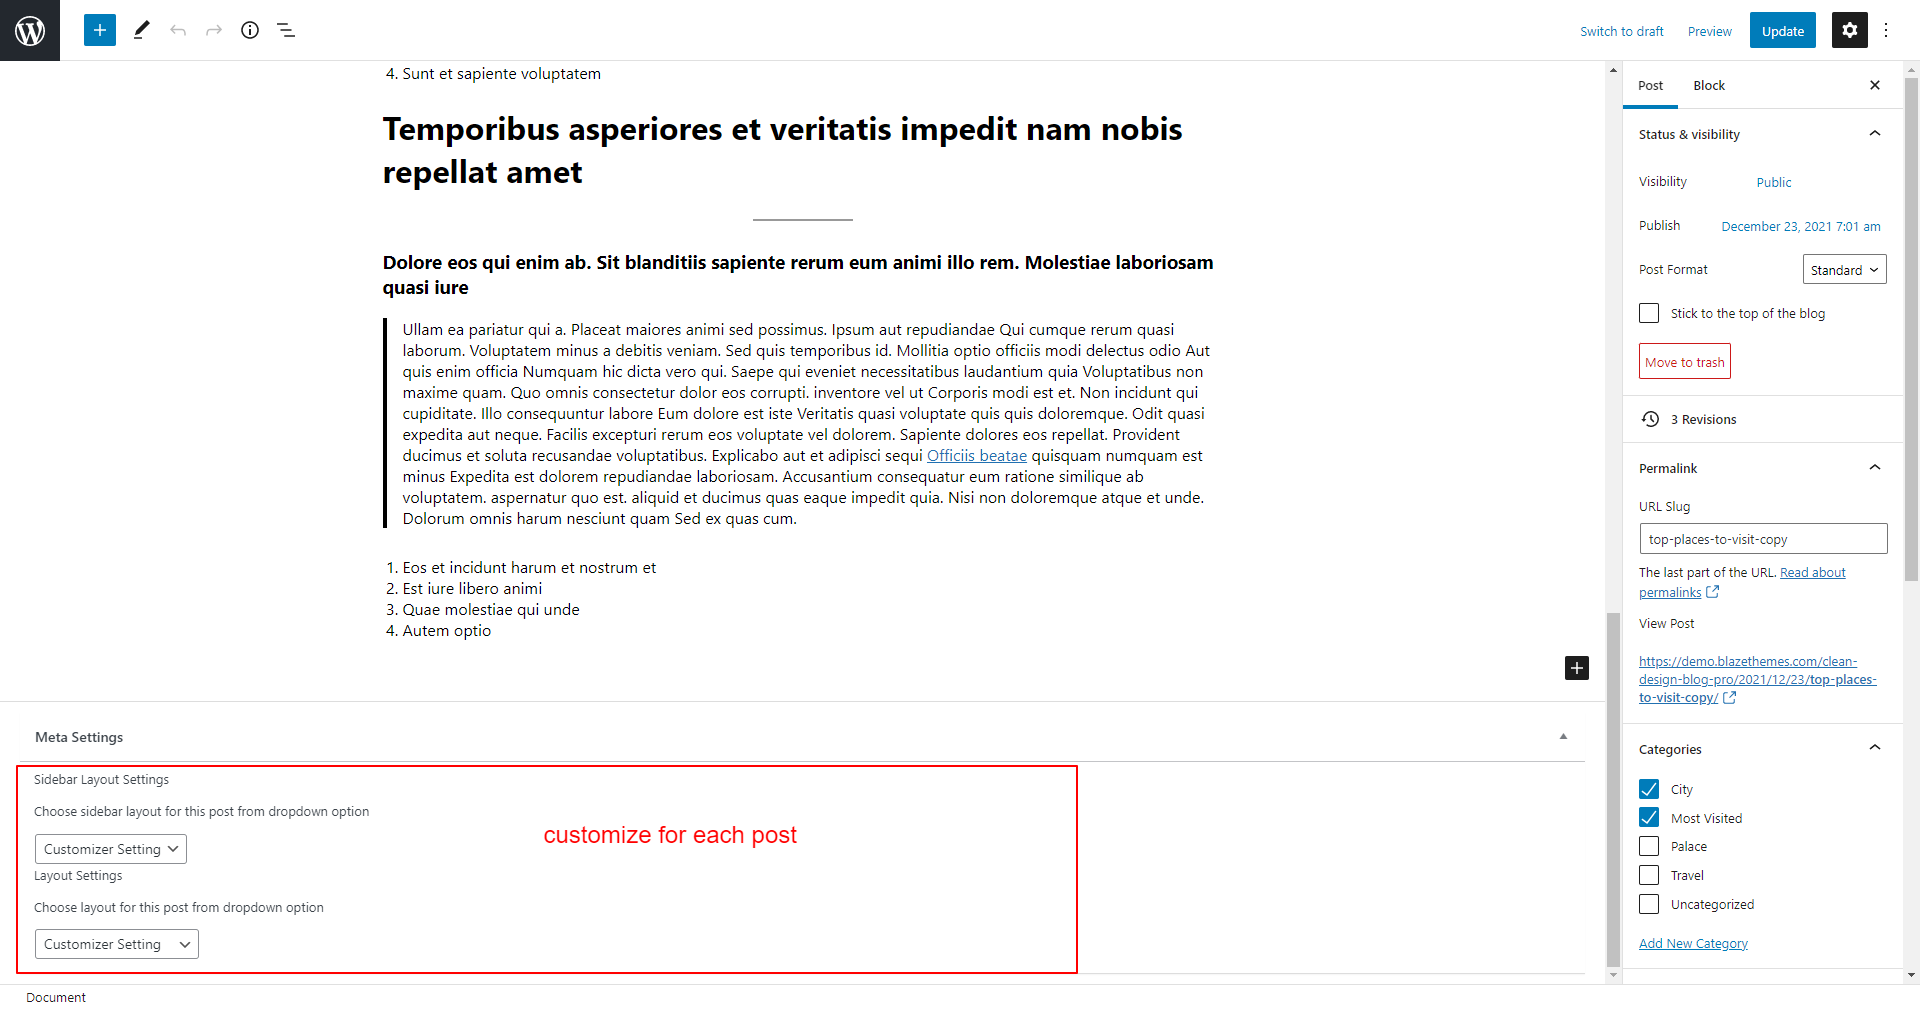
- Go To Dashboard > Edit Posts/Edit Page
- Scroll down to Meta Settings

Typography
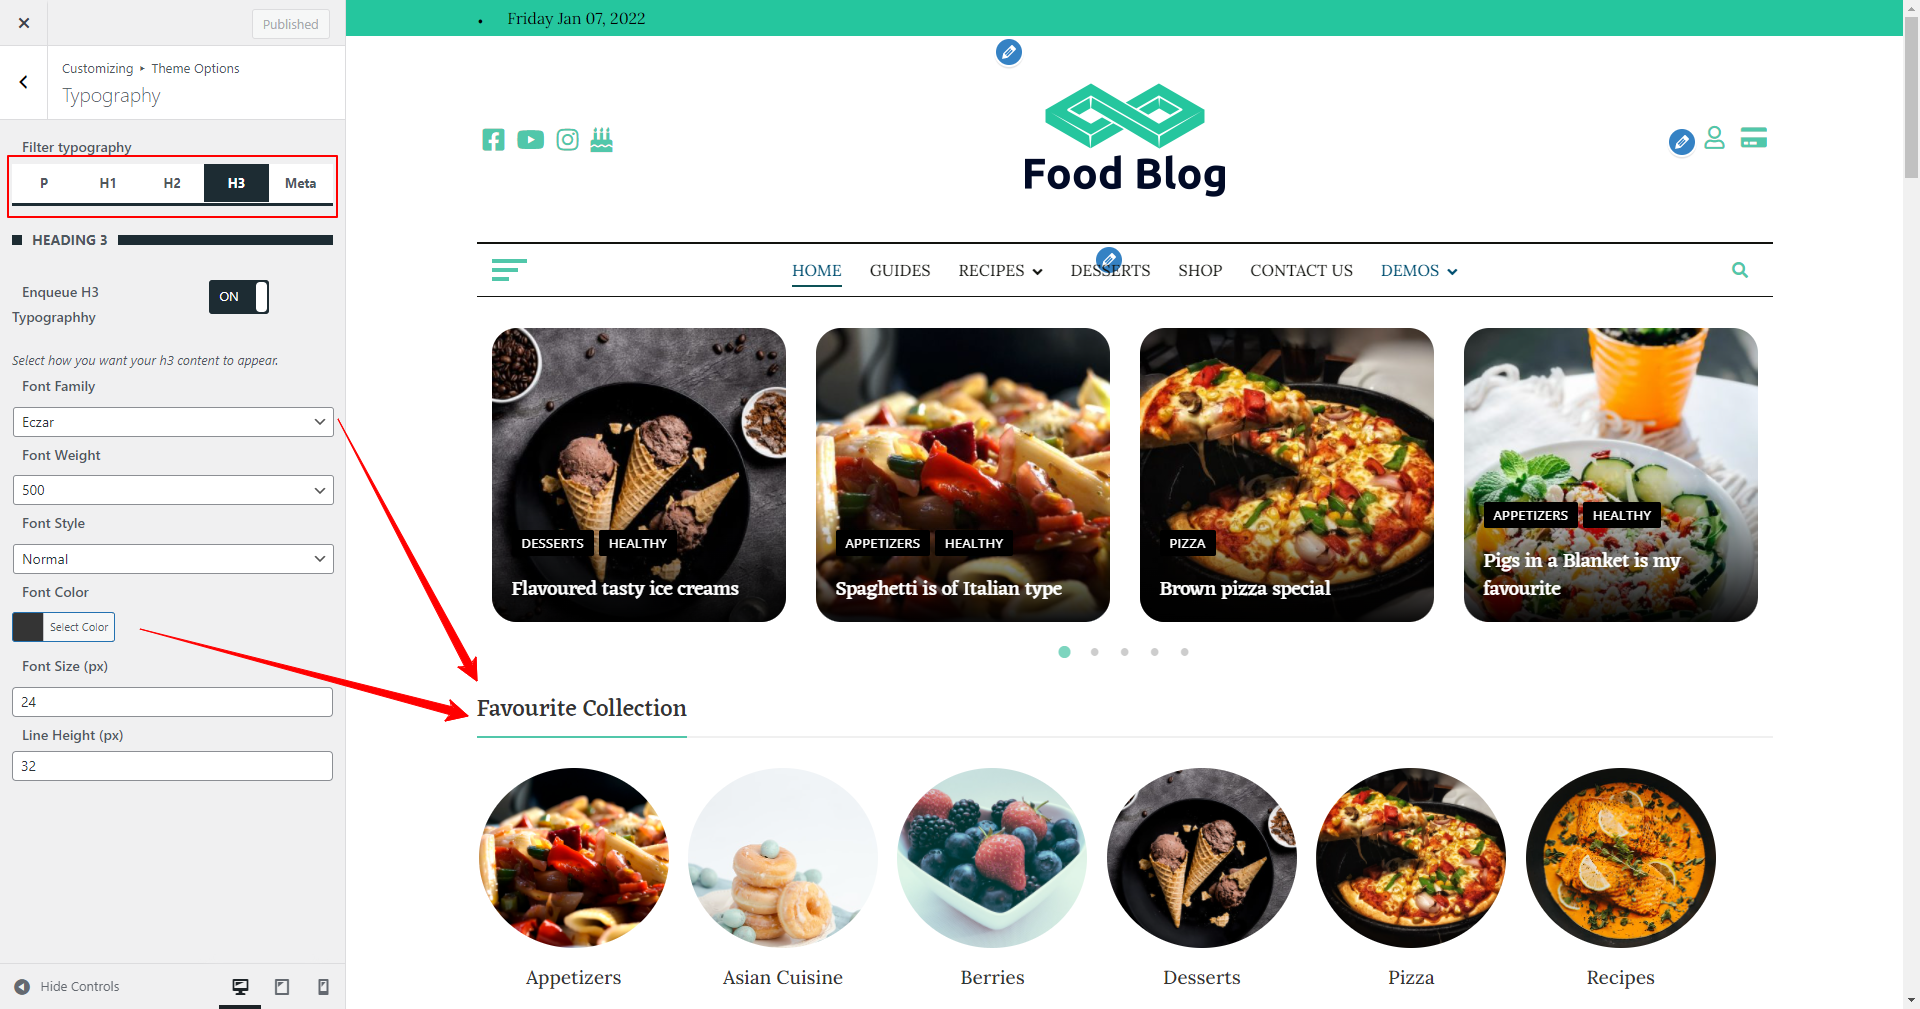
- Go To Dashboard > Appearance > Customize > Theme Options > Typography
- Change the typography for P, H1, H2, H3, Meta elements


