Influential Premium Theme Documentation
- Getting Started
- Installation
- License Integration
- Demo Import
- Frontpage Integration
- Site Logo & Title
- Header Settings
- Menu Colors
- Category colors
- Innerpages Settings
- Banner Slider
- Author Section
- Categories Collection
- Post Grid
- Post List
- Posts Grid Alter
- Posts Carousel
- Posts Featured
- Footer Settings
- Footer Copyright Text
- Translation
Getting Started
Influential is a modern responsive WordPress theme that lets you write blog posts and articles with ease. Focusing on user flexibility it has very easy-to-use customizer options. It has more than 25 + blog posts layouts and 4 useful widgets that make your blog website seem complete. Compatible with the latest WordPress version, it comes with dozens of amazing features like numerous colors option, typography with more than 600+ google fonts, sticky header, unlimited social icons, button layouts, page breadcrumbs, page posts archive layouts, sidebar layouts, sticky sidebar, scroll to top options, multiple header layouts, and much more to explore inside the theme. We provide free support for you and are glad to help you out with any type of theme issue.
It is fully integrated with the Woocommerce plugin and uses the best clean SEO practices. Built more than 100+ layouts with possible combinations of blocks available. Check out our beautiful pre-built demos now: All pre-built demos
Installation
- Log in to your WordPress Administration Panel.
- Click on Appearance -> Themes -> Add New
- Search for “Influential” in the search field.
- You can upload the theme zip file if you have downloaded before.
- Click on Install button and then Activate the theme.
Pro Version
Buy Influential premium version from the blazethemes store you will get email once your purchase is completed. Download the theme zip from the link given in the email or download the latest version of the theme from “My Account” page
- Log in to your WordPress Administration Panel.
- Click on Appearance -> Themes -> Add New
- Upload the theme zip file that you have downloaded.
- Click on Install button and then Activate the theme.
Download the latest version of the Influential theme from https://wordpress.org/themes/influential page.
- Unzip the downloaded zip file.
- Upload the unzipped file inside public_html/wp-content/themes/.
- Now, activate the theme through Dashboard > Appearance -> Themes
- Activate the Influential Pro and Click on “Customize” in the Appearance Menu in the Dashboard. Now you can customize or modify according to your choice.
Pro Version
Buy Influential premium version from the blazethemes store you will get email once your purchase is completed. Download the theme zip from the link given in the email or download the latest version of the theme from “My Account” page
- Unzip the downloaded zip file.
- Upload the unzipped file inside public_html/wp-content/themes/.
- Now, activate the theme through Dashboard > Appearance -> Themes
- Activate the Influential Pro and Click on “Customize” in the Appearance Menu in the Dashboard. Now you can customize or modify according to your choice.
License Integration
Pro Version
You need to activate the license key in order to receive Automatic Theme Updates which includes featured updates, security updates and bug fixes. To activate the license key,
- First you have to find the license key that you will get in your purchase confirmation email.
- You can also find your license key in “My Account” page of blazethemes.com
- Now, go through your dashboard > appearance > Influential License
- Paste the license key in the input field and click “Activate License”
Demo Import
After you activate Influential in your website. You can use demo import to make your site look like one of our available demos.
- Go to Appearance > Influential Info
- You can see list of all demos in this page
- If you have not install/activate the Blazethemes Demo Importer plugin Click on install/activate demo importer button just above the demos listing section
- Then, hover onto the demo you want to import and Click Install
- It will land you to the demo importer setting page
- Check the box if you want to reset your website data before demo import( Note : It will erase all of your posts, pages, media and website data )
- Uncheck box if you donot want to erase your previous data. ( Note : Your site may not look exactly like demo as your previous posts, pages, categories or tags may collide with new datas )
- Final Note: Always backup your website before resetting website for demo import.
- Finally, your site now looks exactly like a demo. Go on and Customize further with your choice
Frontpage Integration
To display frontpage sections
- Go through Dashboard > Customizer > Homepage Settings > Enable the option “Show frontpage sections”
Site Logo & Title
To upload and change site logo
- Dashboard > Appearance > Customize > Site Identity
- Upload the logo you want to set for your site.
- Upload the logo for site icon as recommended it should be square and at least 512 * 512 pixels.
- Display or hide Sit Title and Tagline from Display Sit Title and Tagline

Header Settings
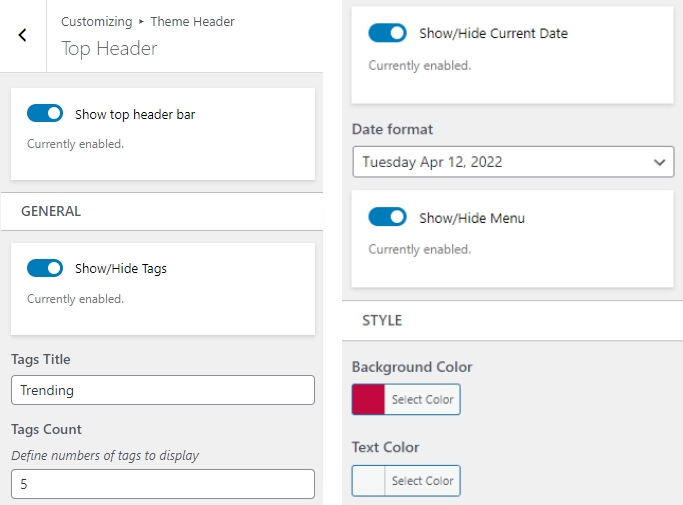
To work on Top Header
- Dashboard > Appearance > Customize > Theme Header > Top Header
- Show or hide top header bar
- Change text color and background color

Pro Theme
- Show or hide top header bar
- Show or hide tags and change tags title and tags count
- Show 0r hide current date and change date format
- Show or hide menu
- Change text color and background color
To work on Main
- Dashboard > Appearance > Customize > Theme Header > Main
- Toggle to show social icons, toggle sidebar and search bar
- Change header text color, background color

Menu Colors
You can change menu border color, background color
- Dashboard > Appearance > Customize > Theme Options > Menu Section
- Change border colors

Pro Theme
You can change menu colors, menu backgrounds, active menu colors and hover menu colors
- Select background color, text color, active color, sub-menu color, border color
- Scroll down and select mobile menu active color and background color

Innerpages Settings
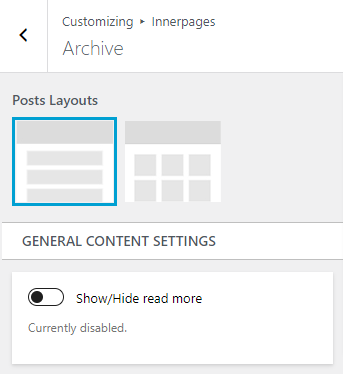
To work on Archive
- Dashboard > Appearance > Customize > Innerpages settings > Archive
- Change posts layouts
- Toggle to show read more button
Pro Theme
- Select pagination type from dropdown
- Select post content to display from dropdown
- Choose word count for content
- Toggle to show post date
- Toggle to show post author
- Toggle to show post categories
- Toggle to show post tags

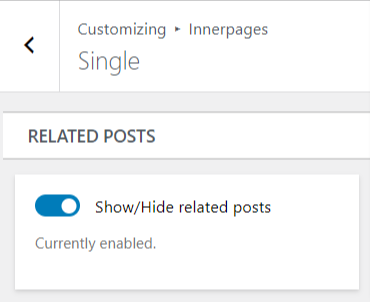
To work on Single
- Dashboard > Appearance > Customize > Innerpages settings > Single
- Toggle to show related posts
Pro Theme
- Toggle to show post date
- Toggle to show post author
- Toggle to show post categories
- Toggle to show post tags
- Toggle to show author box
- Toggle to show related post
- Choose the number of posts to display

Pro Theme
To work on Search
- Dashboard > Appearance > Customize > Innerpages settings > Search
- Choose search title
- Choose search content
- Select pagination type from dropdown

Pro Theme
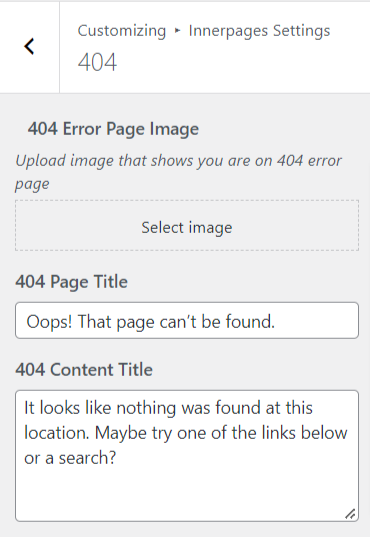
To work on 404 Error Page
- Dashboard > Appearance > Customize > Innerpages settings > 404
- Select image
- Select 404 page title
- Select 404 content title
Banner Slider
To work on Banner Slider
- Dashboard > Appearance > Customize > Banner slider
- Enable banner slider section
- Select category from dropdown
- Choose number of posts to display
- Toggle to show post excerpt
- Select block layouts
- Toggle to show or hide the block

Pro Theme
- Toggle post title
- Toggle post categories
- Toggle post excerpt
- Change the slider controls
- Select block layouts

Author Section
To work on Author Section
- Dashboard > Appearance > Customize > Author Section
- Enable author section
- Choose author image ( smaller image and bigger image )
- Change author title and description

Pro Theme
- Select signature image
- Change title color, description color, background color

Categories Collection
To work on categories collection block
- Dashboard > Appearance > Customize > Frontpage sections > Choose any section
- Click to new block and add categories collection
- choose the categories from multi-checkbox
- Toggle to show categories count
- Select block layouts
- Toggle to show or hide the block

Pro Theme
- Toggle to show categories title
- Select block layouts

Post Grid
To work on post grid block
- Dashboard > Appearance > Customize > Frontpage sections > Choose any section
- Click to new block and add post grid
- Change block title from Block Title
- Select category from dropdown
- Choose number of posts to display
- Toggle to show or hide post content
- Select block layouts
- Toggle to show or hide the block

Pro Theme
- Toggle to show or show featured image, post title, post categories, post tags, author, date, comment
- Choose the length of content
- Toggle to show or hide read more button
- Select block layouts

Post List
To work on post list block
- Dashboard > Appearance > Customize > Frontpage sections > Choose any section
- Click to new block and add post list
- Select category from dropdown
- Choose number of posts to display
- Toggle post date
- Toggle comments number
- Toggle post content
- Choose block layouts
- Toggle to show or hide the block

Pro Theme
- Toggle to show featured image
- Toggle to show post title
- Toggle to show post categories
- Toggle to show post tags
- Toggle to show author
- Choose the length of content
- Toggle read more button
- Select block layouts
- Select block layouts

Posts Grid Alter
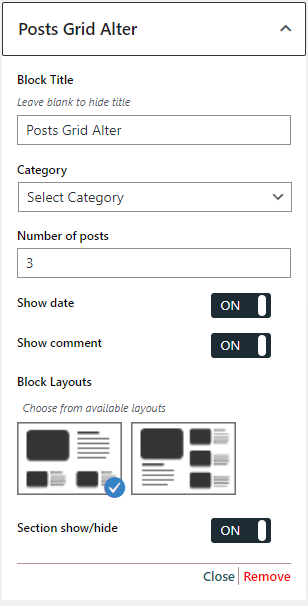
To work on post Grid Alter
- Dashboard > Appearance > Customize > Frontpage sections > Choose any section
- Click to new block and add post grid alter
- Select category from dropdown
- Choose number of posts to display
- Toggle post date
- Toggle comments
- Choose block layouts
- Toggle to show or hide the block
Pro Theme
- Toggle to show featured image
- Toggle to show post title
- Toggle to show post categories
- Toggle to show post tags
- Toggle to show post author
- Toggle to show post content
- Choose the length of content
- Toggle to show read more button
- Select block layouts

Posts Carousel
To work on post Carousel
- Dashboard > Appearance > Customize > Frontpage sections > Choose any section
- Click to new block and add post carousel
- Select category from dropdown
- Choose number of posts to display
- Toggle post date
- Toggle comments
- Choose block layouts
- Toggle to show or hide the block

Pro Theme
- Toggle to show featured image
- Toggle to show post title
- Toggle to show post categories
- Toggle to show post tags
- Toggle to show post author
- Toggle to show post content
- Choose the length of content
- Toggle to show read more button
- Select carousel controls from multi-checkbox
- Select carousel speed, column and responsive column
- Select block layouts

Posts Featured
To work on post Featured
Pro Theme
- Dashboard > Appearance > Customize > Frontpage sections > Choose any section
- Click to new block and add post Featured
- Select category from dropdown
- Toggle to show featured image
- Toggle to show post title
- Toggle to show post categories
- Toggle to show post tags
- Toggle to show post author
- Toggle to show post date
- Toggle to show post comment
- Choose the length of content
- Toggle to show read more button
- Select block layouts

Footer Settings
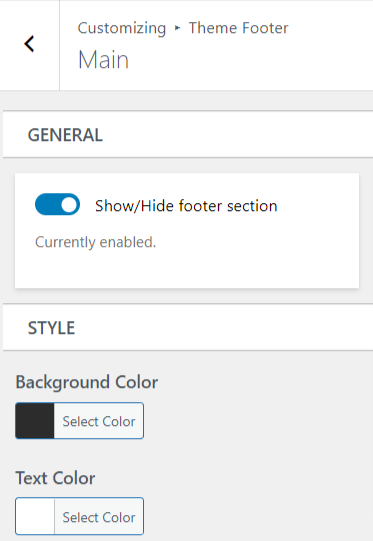
To work on Main Footer
- Dashboard > Appearance > Customize > Theme Footer > Main
- Toggle to show or hide footer section
- Choose text color and background color
Pro Theme
- Toggle to show or hide footer section
- Choose Footer Layouts
- Select background image
- Select background color and text color

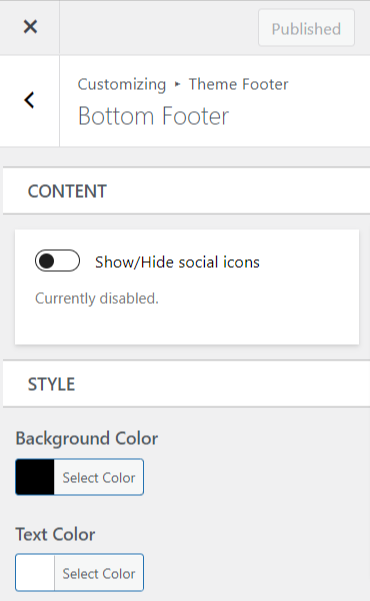
To work on Bottom Footer
- Dashboard > Appearance > Customize > Theme Footer > Bottom footer
- Toggle to show/hide social icons
- Change background color and text color
Pro Theme
- Toggle to show/hide footer site logo
- Upload footer logo image
- Toggle to show/hide footer menu
- Change site info
- Change background color and text color

Translation
To translate Influential theme in your language.
- Activate “Loco Translate” Plugin from Dashboard > Plugins > Add new > Search for Loco Translate
- Install & Active the plugin.
- Now go to Loco Translate in your dashboard left admin menu.
- Click on active theme
- Choose the language you want to translate to
- Then add string of your langauge


